My process for hamon’s changes quite frequently and I am by no means an authority or expert on the process, this is just how I do it right now.
Always wear Respirator and Safety Glasses!
There are two steel types that I find easiest to produce a hamon with because they are Shallow Hardening Steel: 1095 and W2. They both require precise temperature control for 8-10 minutes during HT. Not "Heat up and Dunk" steel types, you have to be very careful to not over heat. I have seen some nice hamon's on W1, 1075 and 1084 as well.
Thermal Cycles:
After I have the blade rough ground I Normalize it through Thermal Cycles. I thoroughly heat to 1600 F then air cool to Black, Heat to 1475 F Cool to Black, Heat to 1425 (Sub Critical) and let cool to the touch. Clean the blade up again making sure to remove all scratches to at least 220 Grit to avoid the blade cracking along the scratch lines (I think of it as a piece of scored glass). Wash the blade with dish soap thoroughly to remove any oil or dirt and dry it off.
Clay Coat:
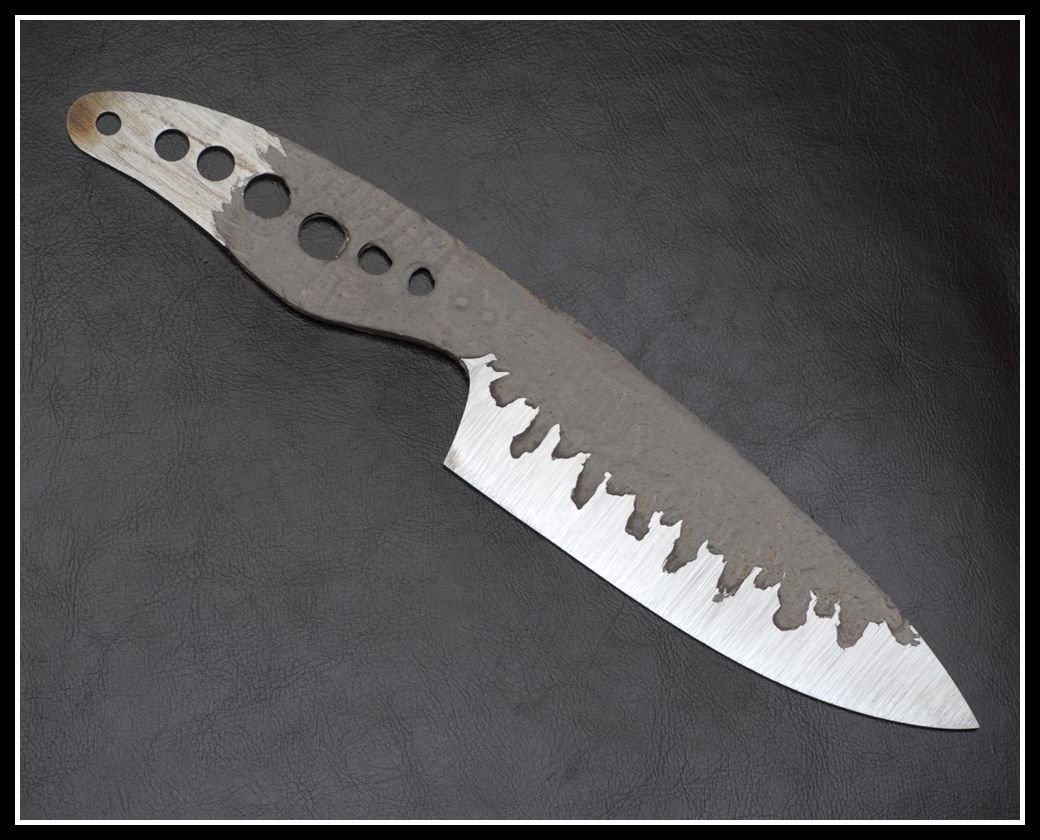
Apply a thin coat of Furnace Cement (Rutlands) or Satanite on the spine with thin fingers coming down in the same place on both sides of the blade. Do not go all the way to the cutting Edge. (I will attach a photo of one of my knives with the clay on it). I also thin out the cement and use a small art paint brush to wash around the edges of the already applied clay to increase the Ashi (White stuff in the Hamon when polished up). After I have applied the clay I let it air dry for a few hours, then place in the oven at 275F for 30 minutes to dry completely.
Heat Treat:
I use an Evenheat Knife Oven for my HT. I have spent a lot of time working on the process and temp control of the oven (Over a Year). My oven reads about 25-30 F degrees hotter than the inside is. I set my oven to 1470 F (Actual Temp +/- 1450 F) for 60 Min. It takes about 30 minutes to get up to 1470 F. I then let 20 minutes expire on the timer to make sure the oven heat is nice and even inside.
Oven Timer: 40Min
I place the knife in the oven on its spine, Edge up. I made the mistake of putting it edge down for quite a while. The problem with this is, whatever the blade is resting on acts as a heat sink and pulls the heat out of the steel. This will often cause your blade edge not reach critical. Which is exactly what you want to happen to the spine not the cutting edge!
Oven Timer: 35Min
Take a quick Peek at the blade in the oven. Make sure the room dark enough to see Colors, I close doors and turn all but one light off. I have a magnet on a telescoping rod (Radio Antenna-ish) that I use to check for critical on the cutting Edge, don't burn yourself 1450 F burns quick and deep.
* If it has not reached critical I Close the door and Check again every 3-4 Minutes
* If it is non-magnetic I quickly close the door and start my 8 - 10 min. soak time.
I used to check with the magnet on the handle because it was close to the door and easy to reach quickly, but got false readings because of thickness variations compared to the cutting edge.
Oven Timer: 27 - 25Min
I pull the blade with my tongs and quench in Parks 50 tip first straight up and down to avoid warpage. Moving the blade back and forth like a pendulum. To reduce the vapor Barrier/Jacket, to ensure quick temp reduction. Leave it in the quenchant until room Temperature.
Sometimes the clay breaks off during the quench and sometimes it doesn't. Depending on when this happens in the process has an affect on your hamon. Most hamon's turn out nice even when the clay has popped off.
Check For Hamon:
I scrape off the remaining clay and wipe off the oil. then lightly grind the blade edge with 80 Grit belt that will show the Hamon in the right light. This is my favorite part of the process because you get to see if all your work paid off.
If your edge did not fully harden or the hamon isn't what you want.... Don't throw the blade at the wall Haha! Or as Nick does, Bury it in the driveway. Go back up to the Thermal Cycling step and start over!!!
Tempering:
If you have the Hamon you like, it is important to get your blade Tempered. Right now it is very brittle and you need to bring the Hardness down. Different steel quenched in different quenchants need to be temepered at different temperatures. Do your research and follow a reputable resource, Kevin Cashen's site is always a go to for me (Matherton Forge).
Just as an example...
I used W2 heated to 1450 F (Remember my oven reads High - 1470 F = 1450 F) quenched in Parks 50. The blade should come out of the Quench at approximately 65-67 HRC.
* Temper 1x at 375 F for 1 Hr. let cool in oven (Slow Cool)
* Temper again at 425 F for 1 hr. Cool in oven.
This should bring your blade down to around 60-61 HRC. Great for a slicer. You can adjust your HRC for the intended purpose of your blade. Choppers should be softer (Temper at Higher Temps)
Machine Finish:
After you have tempered your blade to your desired hardness. I clean up the entire blade on the grinder getting it to final thickness, Be very careful not to over heat your blade in the grinding process now. You can ruin your temper and even your hamon if you are not very careful.
I move through the different grits as follows:
* Norton Orange Blaze (80 Grit)
* Norton Orange Blaze (120 Grit)
* 3M Gator Trizact (A160)
* 3M Gator Trizact (A65)
* 3M Gator Trizact (A45)
Hand Finish:
Now the fun part... Hand Sanding!!!
I use windex as my liquid agent to help move material, I have heard of people using Simple Green, WD40, 3 in 1 Oil, Even Motor oil...
I have a few different size pieces of thick micarta that I use as a sanding block. One side I stick something called "Felt Guard" that I got from Home Depot. It is a hard felt that people put on the bottom of their furniture legs to prevent them from scratching floors or ruining carpet.
+cnmQ~~60_35.JPG)
This is how I move through the sandpaper grits:
* RhynoWet (220 Grit) Hard Side of Block (Usually takes 20-30 Minutes)
* RhynoWet (400 Grit) Hard Side of Block (20 Minutes)
* RhynoWet (600 Grit) Hard Side of Block (15 Minutes)
... This is where I Etch my makers mark on the blade and rough fit my Handle Materials
* RhynoWet (600 Grit) Hard Side of Block. (Yes 600 again - 10 Minutes)
* RhynoWet (800 Grit) Hard Side of Block (20 Minutes)
* RhynoWet (800 Grit) FELT GUARD Side of Block (20 Minutes)
Hamon ETCH:
Now time for the Acid Etch. I use Ferric Chloride Etchant (PCB Etchant from Radio Shack) Some people use Vinegar instead of FC, I have played with vinegar quite extensively and didn't like the results I got.... To each his own!
You will need: Ferric Chloride, Rubber Gloves, Cotton Make up Pads, Amonia in a Spray Bottle, 3 in 1 Oil, Face Mask, Safety Glasses...
I have my etchant diluted with Water (4:1) in a tall plastic container. I get everything set up in a safe place. I take the blade inside and Wash with Dish soap in VERY HOT water. with the blade still wet I quickly dunk the blade in the FC solution, pull it out and rub the entire blade hard with the cotton Makeup Pad to make sure the FC is making contact with steel during the etch.
* Dip Blade in FC for approx. 10 Seconds, Pull out and Rub both sides with Pad trying to remove all oxides
* Dip again for 10 Seconds, Rub with Pad.
* Dip for 5 Seconds, Rub with Pad
* Dip for 2 Seconds, Rub with Pad (I start rubbing a bit harder like I am trying to remove a bad stain on the entire blade)
* Now I do a series of Very quick dips and Rubs until I start seeing the Dark line develop along the hamon edge.
* I get a new Make up pad and dip the pad into the etchant and rub the blade with the saturated pad until I have what I want.
I immediately spray the entire knife with Amonia to neutralize the FC. then run out to a designated Dirt patch in the yard and wash the Blade off with the Garden Hose (Don't wash the blade off in your kitchen sink). Then Take the blade in the shop and Dry with a paper towel and apply a Very liberal coat of 3 in 1 oil all over the blade.
Hamon Polishing:
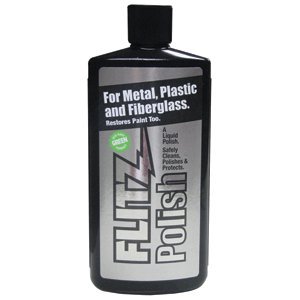
I leave the oil on the blade and apply "Flitz Polish". I use the Watery Green Flitz not the thick stuff in a tube. Again I use the Makeup pads to do the polishing. Sometimes I stop after the Flitz, it is a high contrast finish but does not bring out the Ashi.
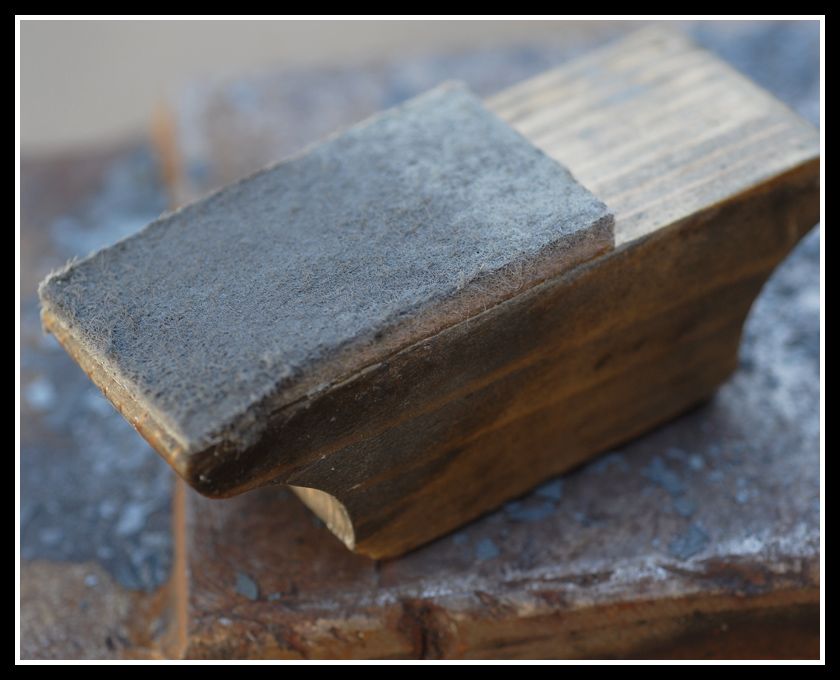
If you want some Ashi in your Hamon (Who Doesn't?) provided you have Ashi from the HT!! I purchased some 1500 Grit Silicon Carbide Powder online. I mix it with 3 in 1 oil to a thin paste. I have a Wood Sanding Block that has a piece of "Felt Guard" (Same stuff I use on the sanding block) on it. I apply the paste directly to the Felt and rub the blade with the saturated Felt. You are polishing with the 1500 Grit and Felt pad. I rub the Entire blade and tang at this stage to remove any Oxides or Color from the FC Etch.
(I am always worried about Contaminants getting into the Pad and scratching the blade finish, I have an test blade that I always use the polishing block on before rubbing on the blade i am finishing... Knock on wood)
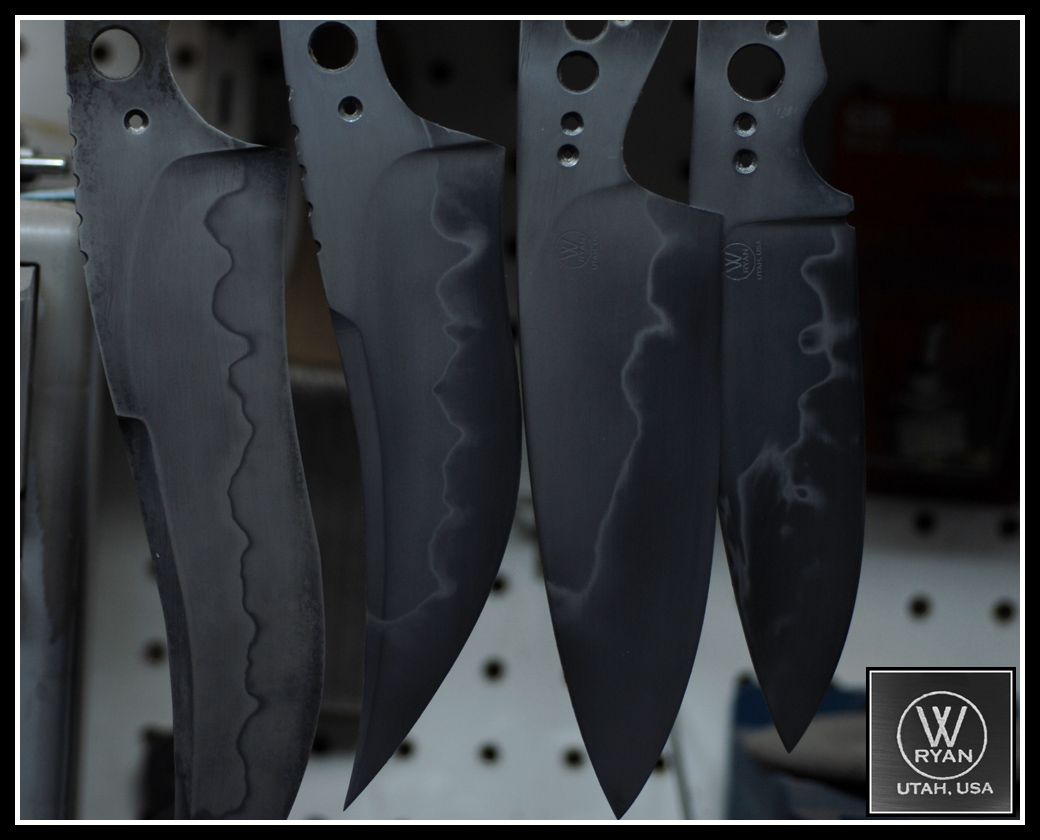
The 3 blades on the right have been polished with the 1500 Silicon powder, the blade on the far left has only been Flitz'd
Then apply another liberal coat of Oil on the entire blade!
I am sure I have left some details out or didn’t make sense in some areas. Please feel free to ask questions or correct me where needed!
MY PERSONAL RESOURCES:
Kevin Cashen (Knifemaker - Matherton Forge)
Mike Quesenberry (Knifemaker)
Nick Wheeler (Knifemaker)
John Doyle (Knifemaker)
Mike Turner (Knifemaker)
BladeForums
Karambit knife is a unique knife that has a fabulous design and style. It is an excellent knife for self defense and a badass fighting knife. Also, the style of the knife is unmatchable. These things make karambit the most incredible knife ever designed.
ReplyDeleteThank you for sharing this useful post with us. I have a website and this website is w1 steel composition related. If you want to see this website? Please click here.
ReplyDeletehttps://materials-today.com/Blog/w1-steel-composition-properties-heat-treatment-applications/.