Mike Turner Cut me a sweet deal on one of his HUGE pieces of
SanMai for the real chopper. As some of you may know I am headed to the OKCA
knife show this month, after the show Mike is putting on a forging clinic for a
few of us. I plan on moving in that direction in my knife making endeavors.
Mike and I discussed the idea of doing a WIP for this guy.
The Design:

SPECS:
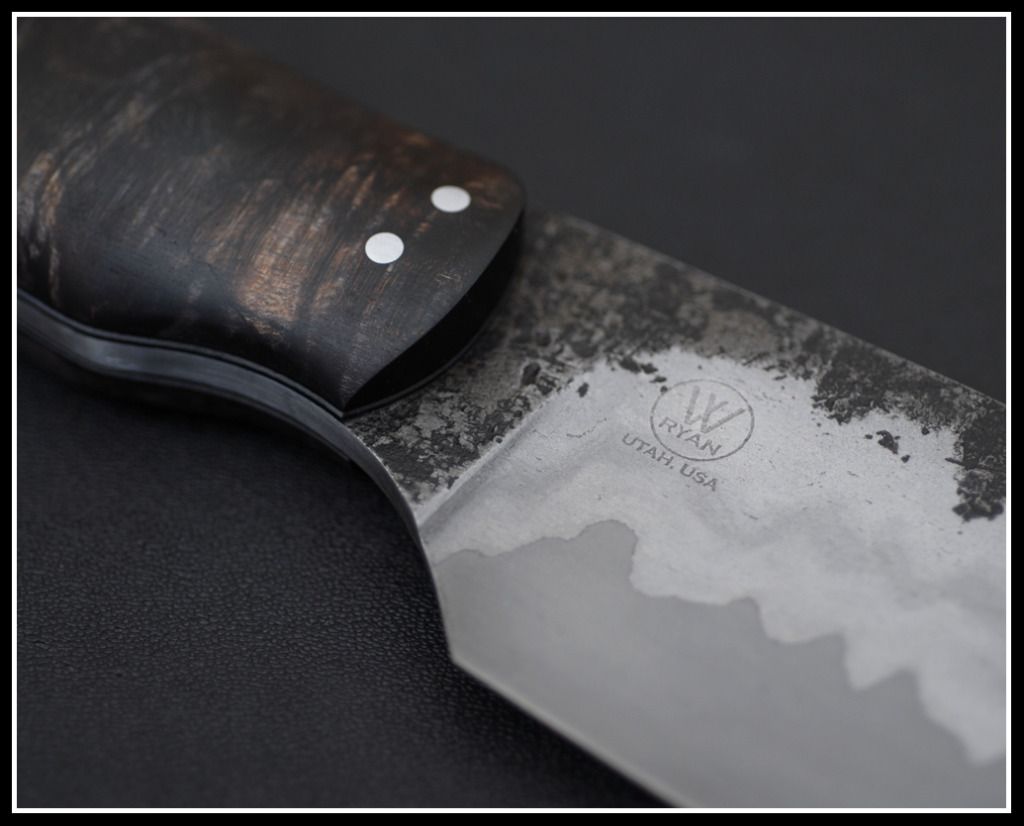
Steel: Mike Turner SanMai (Wrought Iron with Cru Forge V
Core)
OAL: 15.5”
Blade: 9.5”
Handle: Undecided
Stabilized Wood
Misc: Brute De Forge Finish on Flats, Tapered Tang
I cut out the pattern and sent it Mike so he could get the
billet forged to the rough shape. We are on a tight schedule due to the fact I
want to have it finished before I head to OKCA the middle of this month.
Forging The Billet: (Photos and Comments from Mike Turner)
Wrought Iron Anchor cut up and rebar
welded to it for drawing.

1 1/2" round wrought Iron sitting
on my 300 pound Vulcan anvil waiting for the forge to warm up, I threw this one
in as Ryan's chopper is drawn on the anvil for reference while forging out the
san mai billet.

Heat number 2 on the 2 Wrought Iron
Bars, the first heat we straightened the bars out and managed to square them up
a bit.

I have drawn the wrought iron down to
the thickness need for this san mai. Not all of this wrought Iron will go into
Ryan's billet, I wanted to make sure I had enough plus I always draw out extra
wrought iron for future projects.

Here we are ripping down some Cru Forge
V stock for the core.

Here we have our materials gathered.

Here we have ground clean all the
materials.

I Have the pieces clamped up and oriented, we have 2 pieces of Cru Forge V in the blade end and 1
piece in the handle end.

Sorry missed a few shots as it is hard
to take pictures of the action shots working alone, so here we have the bar
forged down to what Ryan has asked for and I have pre bent the bar to fit his
chopper. Now get to work Ryan.

Profiling the Blank:
Mike was very quick and I had the billet in my hands a few
days later. Here is a shot of the Cru Forge V Core sandwiched between the two pieces of Wrought Iron

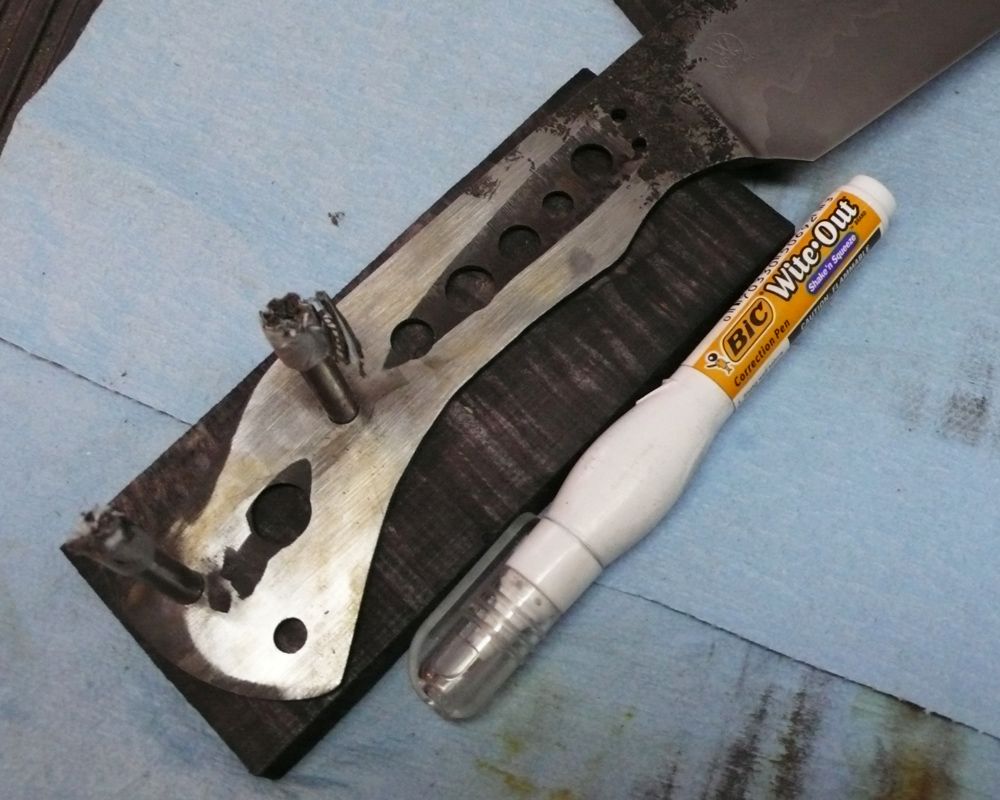
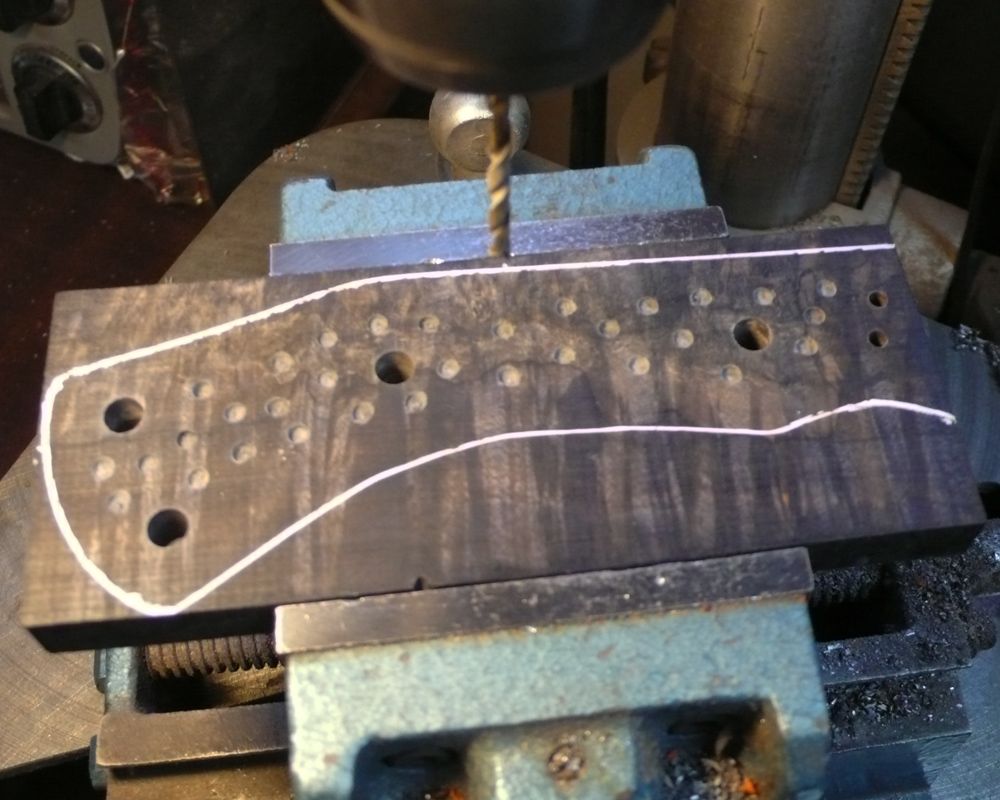
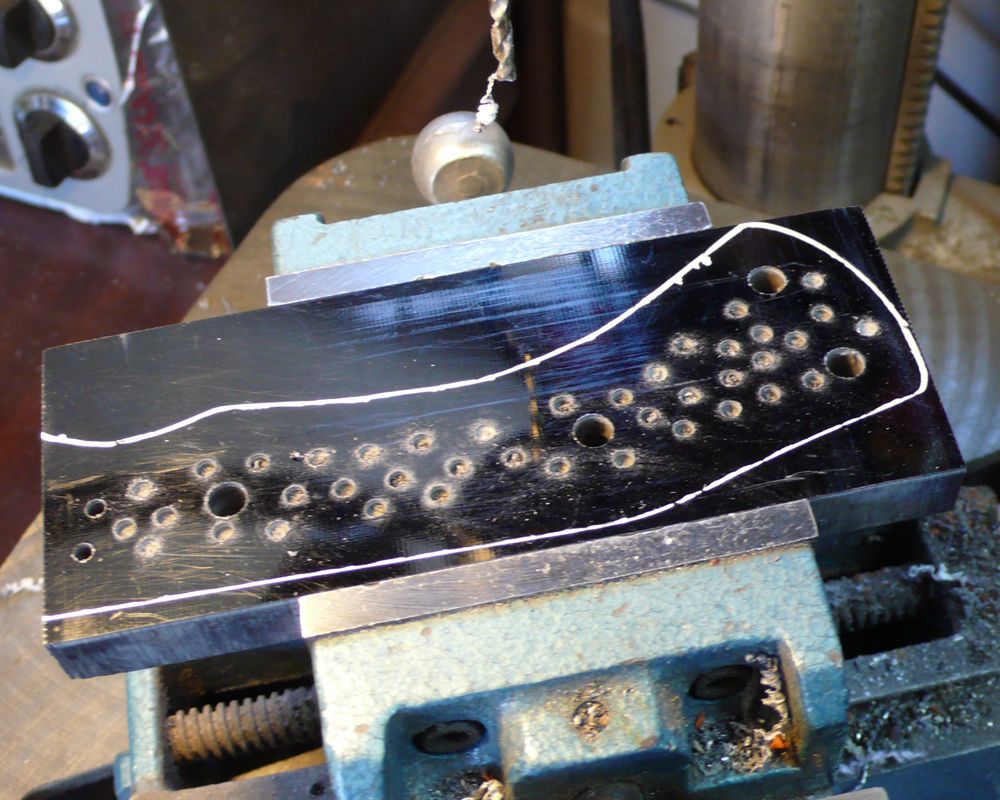
I marked the pattern on the billet with a White out pen for
higher contrast for my old eyes.

If I was doing this chopper by my usual method of stock
removal I would need a huge piece of steel and most would have ended up on the
floor. Mike was kind enough to shape the billet to my design, one of the big
advantages of forging.

Mike told me the billet still needed to be annealed, I ran
it through an anneal cycle bring up to 1600 F. then a slow cool to room temp in the oven.

I have been told a few times that I do this step out of
order…
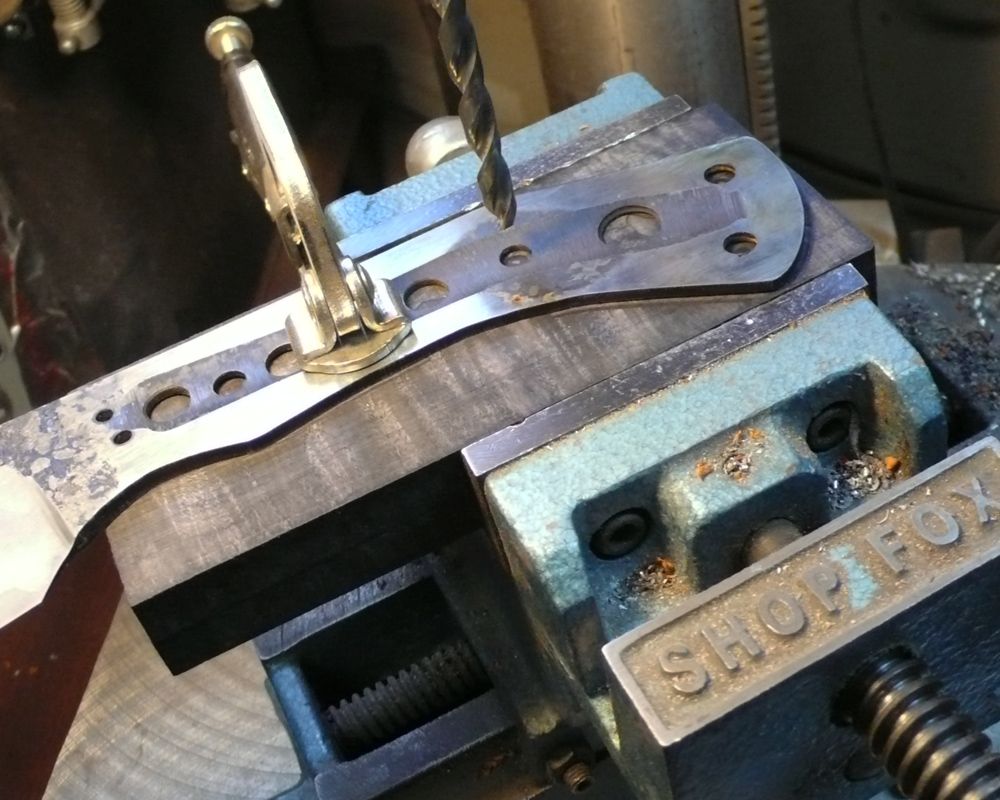
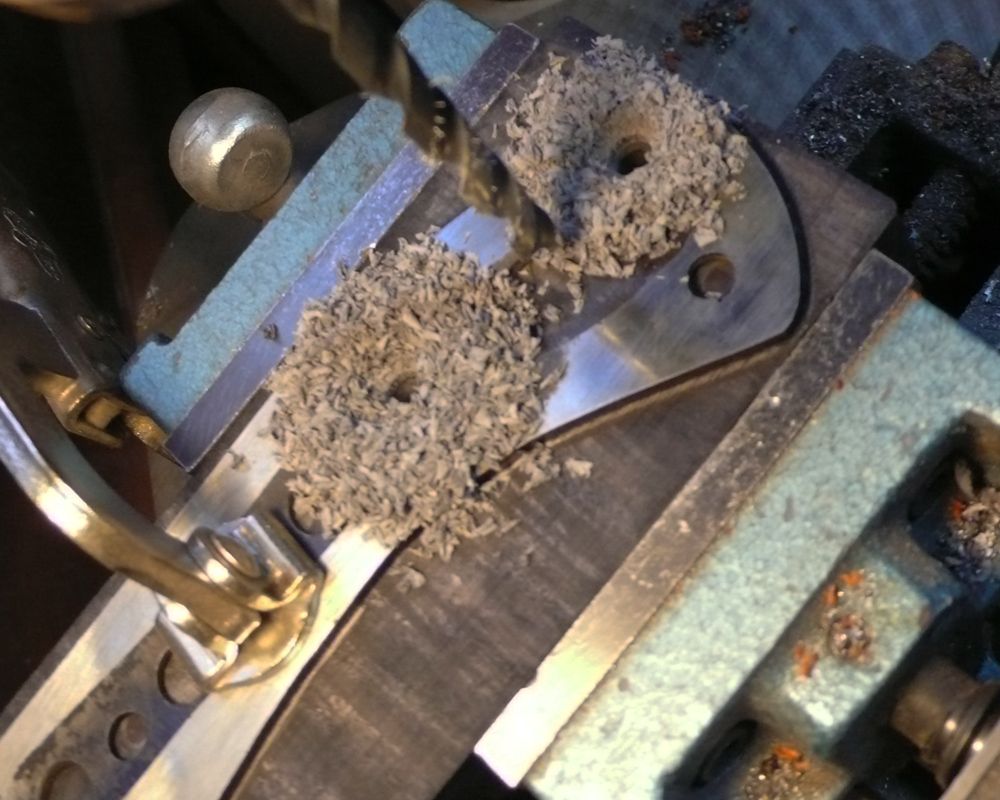
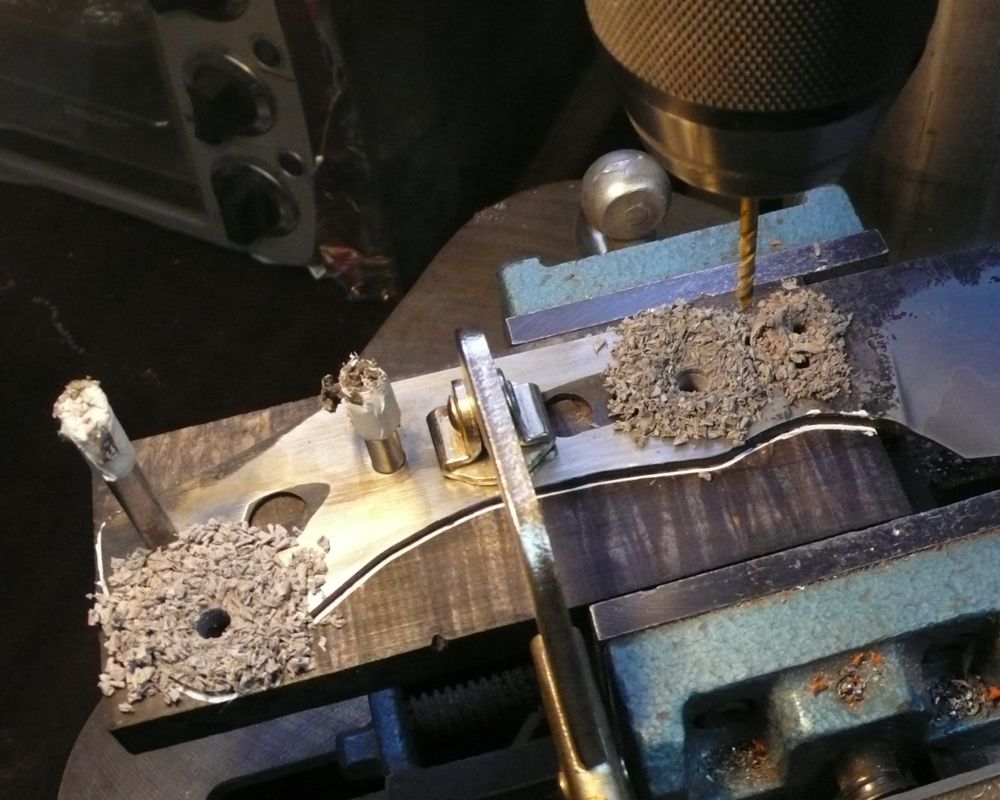
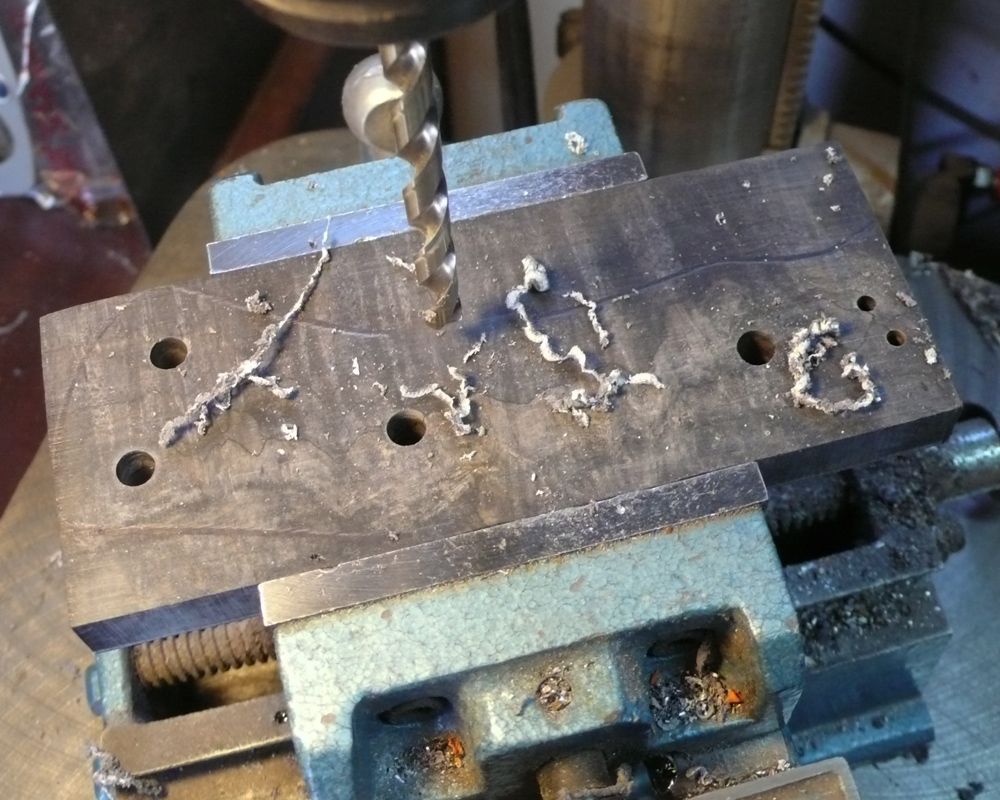
I prefer to drill holes while I still have a square billet/stock. I hold
the material in a Shop Fox Vise on the drill press so it makes the “helicopter
of death” a rare occurrence. The holes with the cross marks will be pin holes
Drilled with “F” (1/4” Pin) and #30 (1/8” Pin)

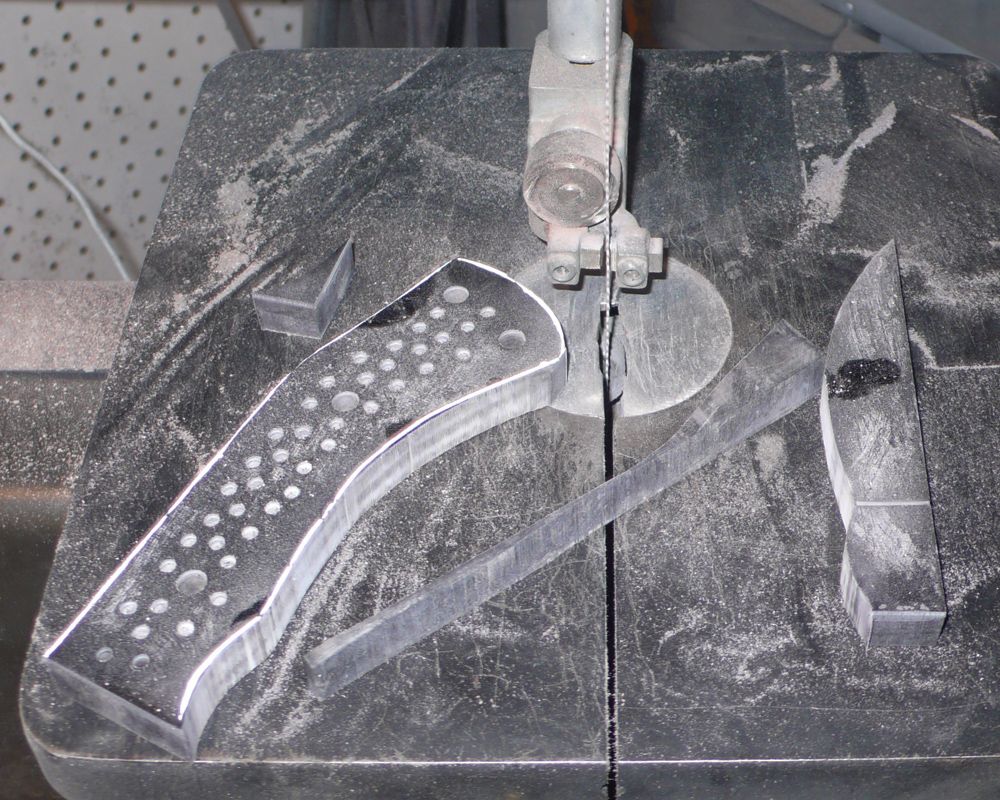
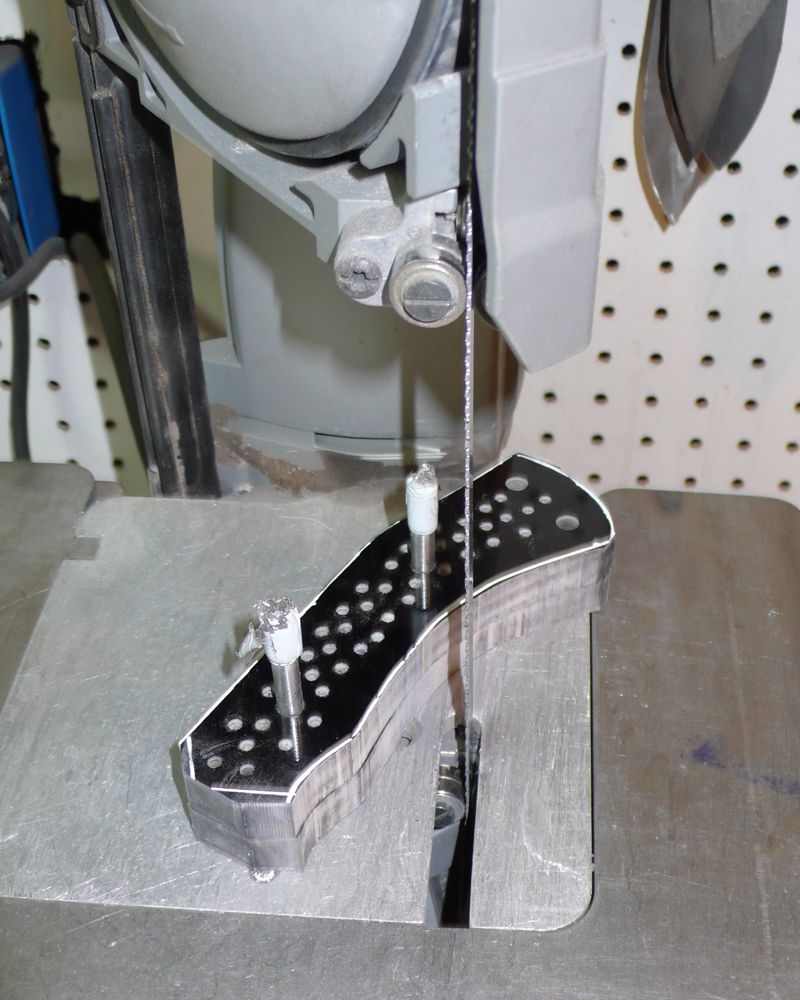
I then take the billet to the saw and remove the excess
material.

I then profile the blank to its final dimensions on the KMG
with an old 36 Grit Belt. I also use files and wheels to make the appropriate
curves in the design.

I used my center scribe to mark the center line of the
billet. I do this around the entire blank because I am going to be tapering the
tang and distal tapering the blade.

I noticed some high points on the flats that I wanted to
knock down so I did a little flat grinding. I didn’t get a photo of this, but
you will see in later photos the clean portions on the ricasso and spine where
I want to have Forge scale and marks (Brute De Forge). I will have to address
this a little later on.
I made a template to mark the planned plunge line on both
sides to help keep them as even as
possible during the rough grind.

Here I have done my primary grind with Blaze 36 grit belt
down to approximately .030” on the edge.
In this photo you can see the removed forge marks mentioned earlier.
Upon close inspection I can already see the CruForgeV core along the edge.
Looks great Mike T!

Now I want to get those beautiful forge marks back for the
finish I am going for. Off to the forge and anvil, as many of you may know I
don’t have a lot of forging experience. I made a quick phone call to Mike to
get some advice, then took the plunge. Brought the billet up to temp. making
sure to keep the billet flat on the anvil began hammering. Also ran it through a few normalizing cycles
to relieve any stress during forging.

Now to taper the tang, I hog out the center of the tang to
make the taper easier to flat grind.

I wanted to make sure the handle scales would line up nicely
but need to keep that forge finish in the ricasso. I also took the belt grit up to 120 so she is
ready for HT!

Here is a before and after comparison photo to show the
Brute De Forge finish.

A quick photo of the blade fresh out of HT. The CruForgeV called for 1500 – 1550 F and quench in Oil, I am using 11 Second which should be just right from my research. I took it up to 1535 F and soaked for 5 minutes then smoked up the place! It came out pretty straight, made a few small adjustments on interrupted quench.
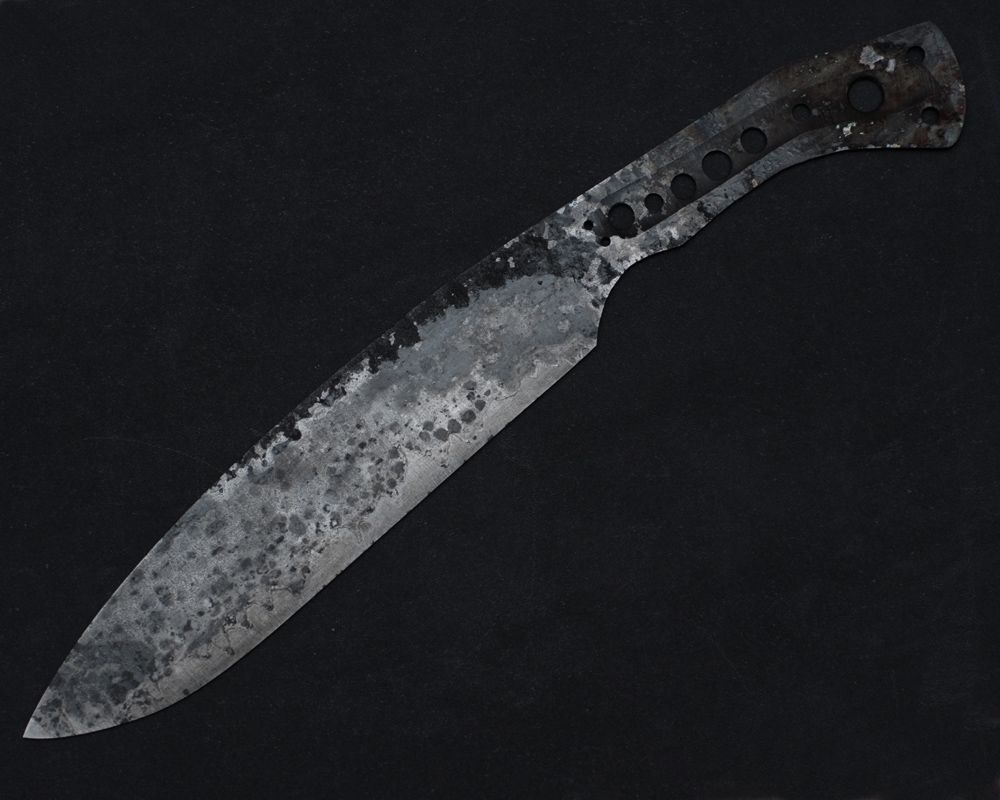
Here is a close up where you can see the Core peeking through the Wrought Iron.
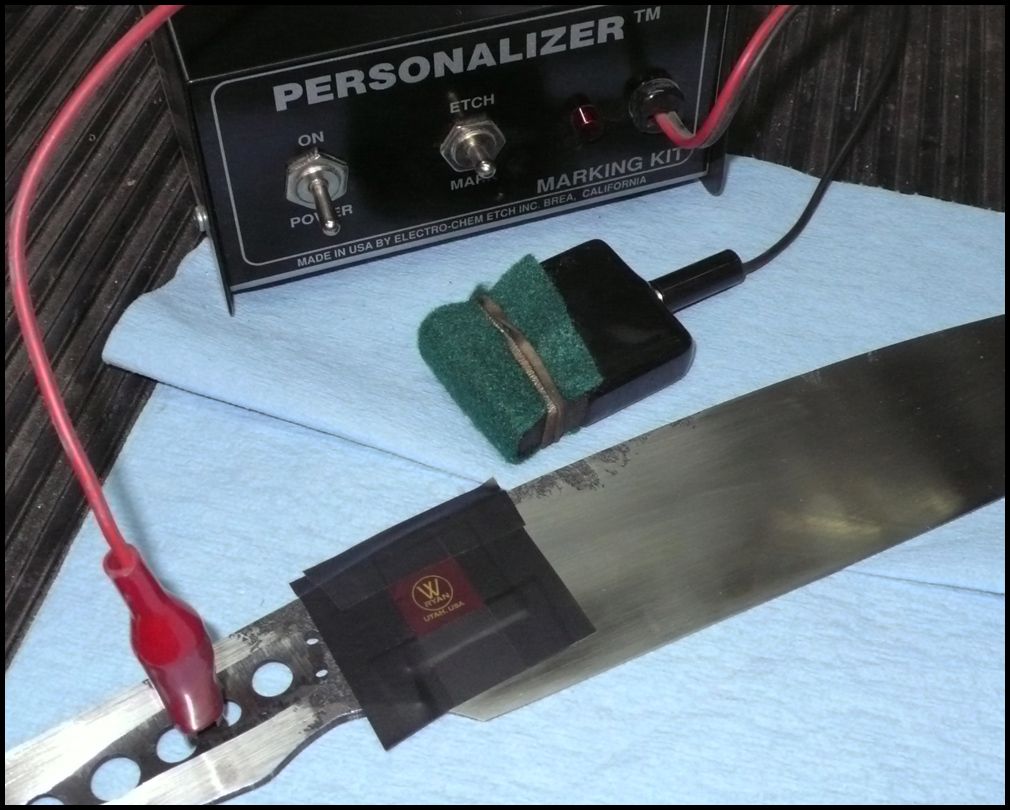
My Etch Process:
- Wash blade with HOT water and Dish soap, dry with paper towel, wipe down Mark area with Acetone
- Tape Mark in place with Electrical tape, make sure to cover any area that may come in contact with the current. Making sure to press the tape firmly around the stencil Edges.
- Attach Ground (Red Wire) to one of the holes in tang, I like to have the blade lay flat on table to avoid any wobble.
- Apply appropriate etchant fluid to Felt, rub with finger to spread evenly along the pad, dab with paper towel to remove any excess fluid.
- With Etcher on “Etch” Setting hold on mark for 1 minute. This time varies depending on the hardness of the material you are marking. Where this is Wrought Iron it is fairly soft.
- Switch to “Mark” Setting Hold on for 5 seconds off for 5 seconds, on for 4 seconds off for 4 seconds and continue to 0
- Turn off etcher remove stencil and spray blade (and stencil) with Windex (W/ Ammonia in it). Rubbing with Windex soaked paper towel.
- Take blade inside and wash again with HOT water and Dish Soap
- Light coat of gun oil over entire blade
Right after the etch
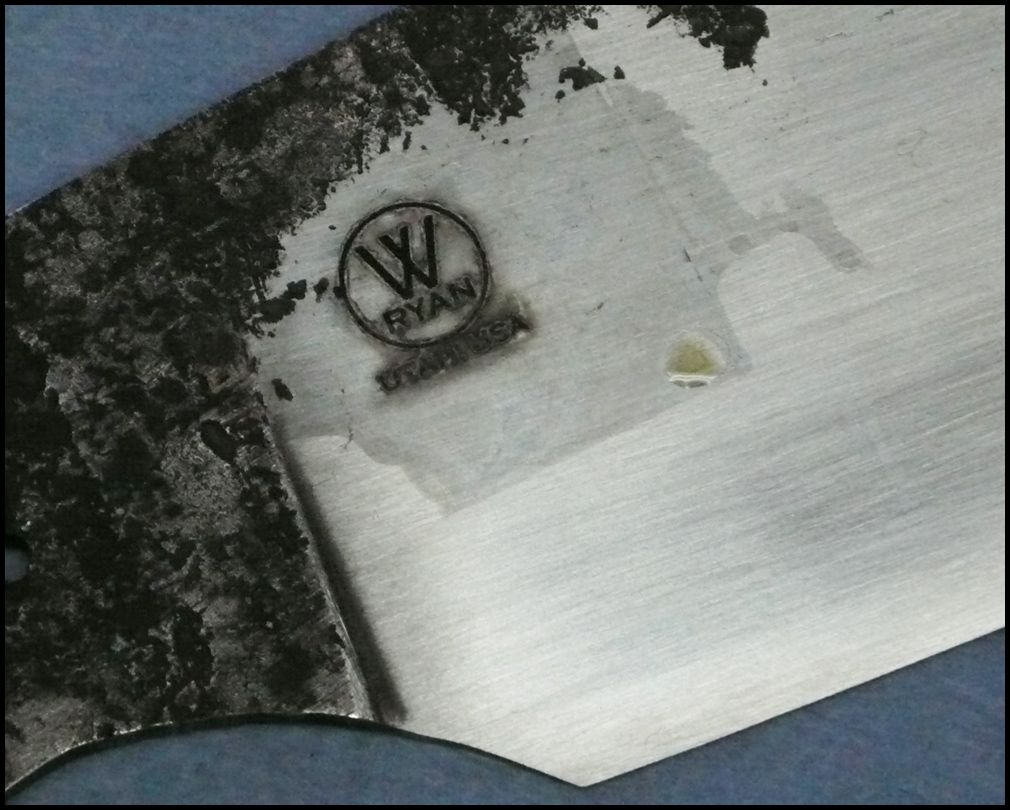
I then get the 600 grit paper again and sand the mark until it is crisp and clear.
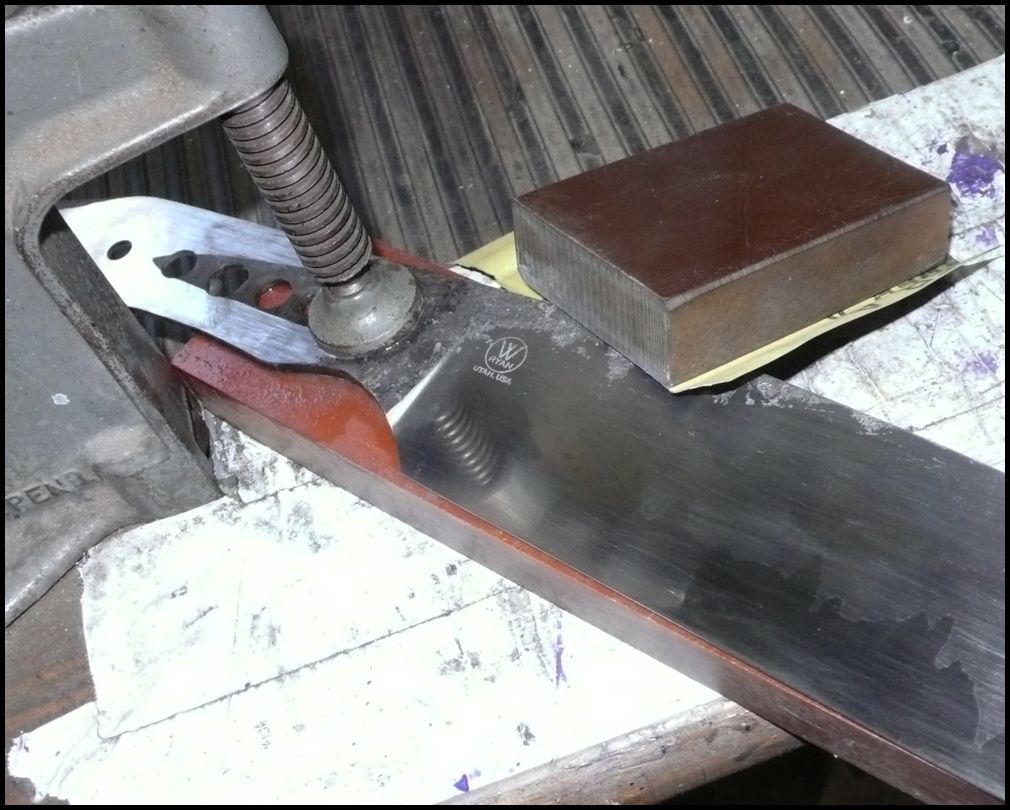
I then continue up through the grits until I am to a Clean 1000 – 1200 Grit finish. I have had some success with only going up to 600 grit on Hamons.
Time to Etch this thing! Patrice you ready?
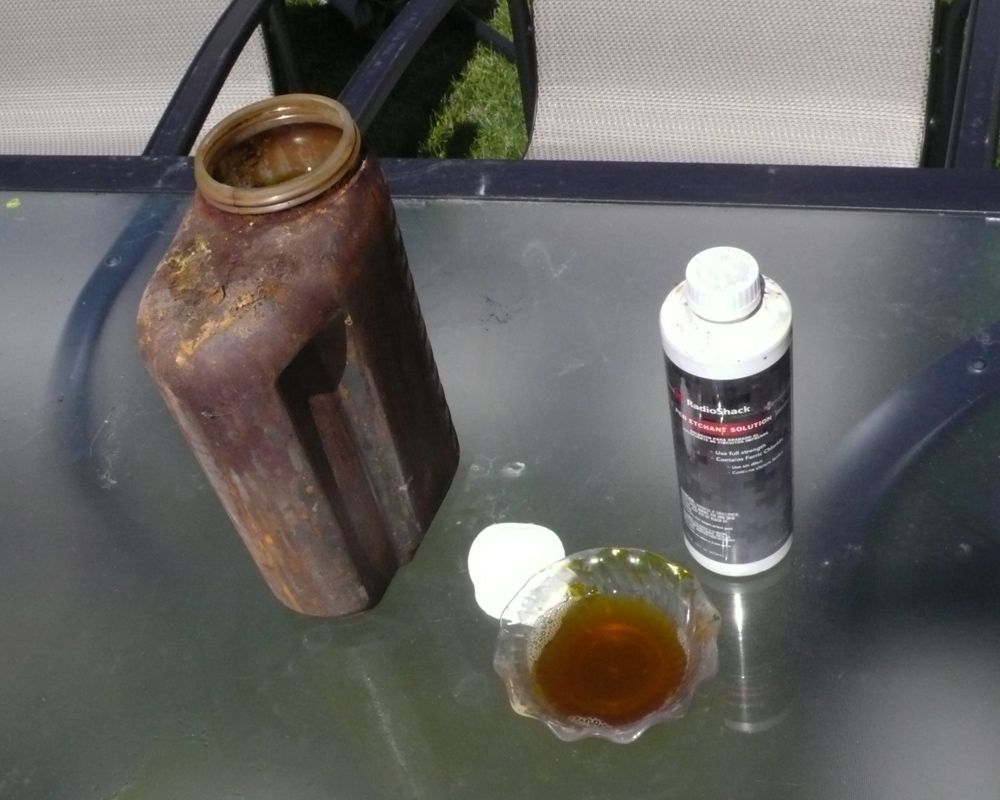
I use the Ferric Chloride found at Radio Shack Labeled “PCB Etchant Solution” this is full strength stuff. I keep a solution diluted 10 parts water to 1 part FeCl in a large plastic container. I also have a stronger solution (2 H20 / 2 FeCl) in a small bowl with some Dish Soap added (Thanks Mr. Wheeler).
My FeCl Etch Process: (Hamon’s I do a little differently)
This process is a mix of other maker suggestions, personal experimentation and flat out superstition.
- I wash the Hand sanded blade with HOT water and dish soap, on the side I have a container with Super hot water ready to place the blade in to keep the steel hot.
- I then place the entire blade in the bottle of 10/1 solution for 30 seconds. Remove blade and rub with a cotton makeup pad saturated with the soapy solution.
- Allow blade to sit in air for 30 seconds then place in hot water container to warm blade up again.
- Repeat process until you have the look you want. With Damascus and SanMai (Especially Wrought Iron) I increase the time in the solution each cycle.
- Thoroughly spray entire blade with 50/50 Ammonia and rub with paper towel
- Wash hands and entire blade with Hot Soapy water
- Dry off and apply thin coat of gun oil
- Flitz polish with a cotton makeup pad
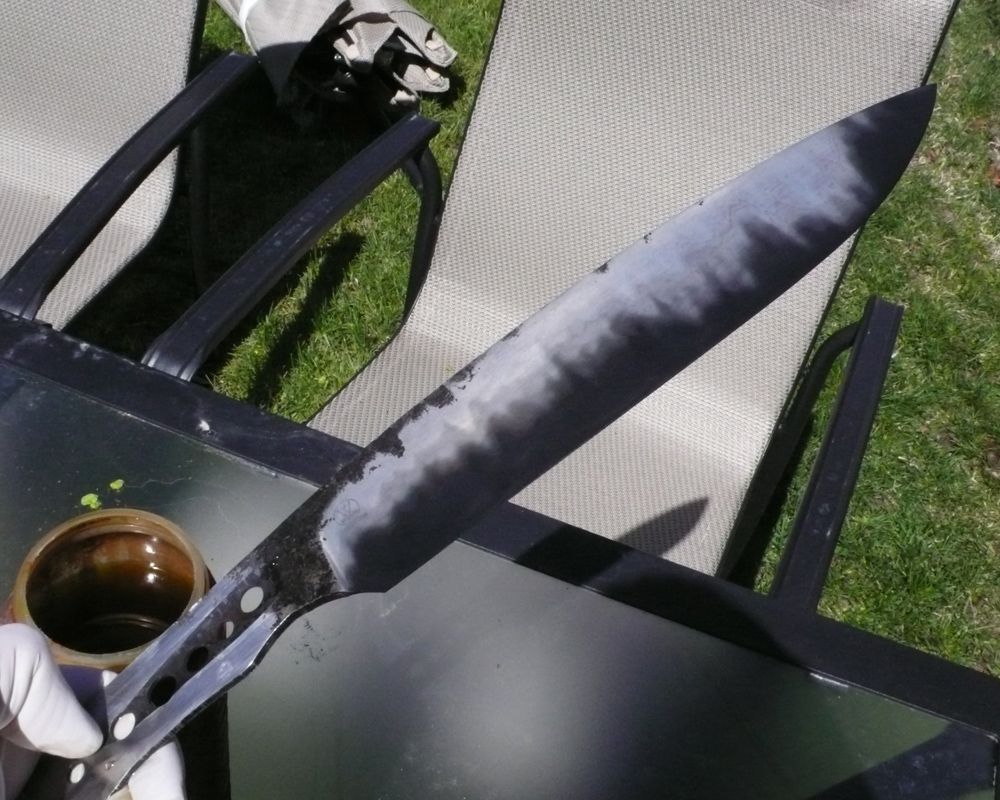
This is the blade after etched and cleaned with Ammonia and Washed. The dark on the core is still covered with Oxidation so the contrast is more than it will be after Flitz polish. This always disappoints me. Haha
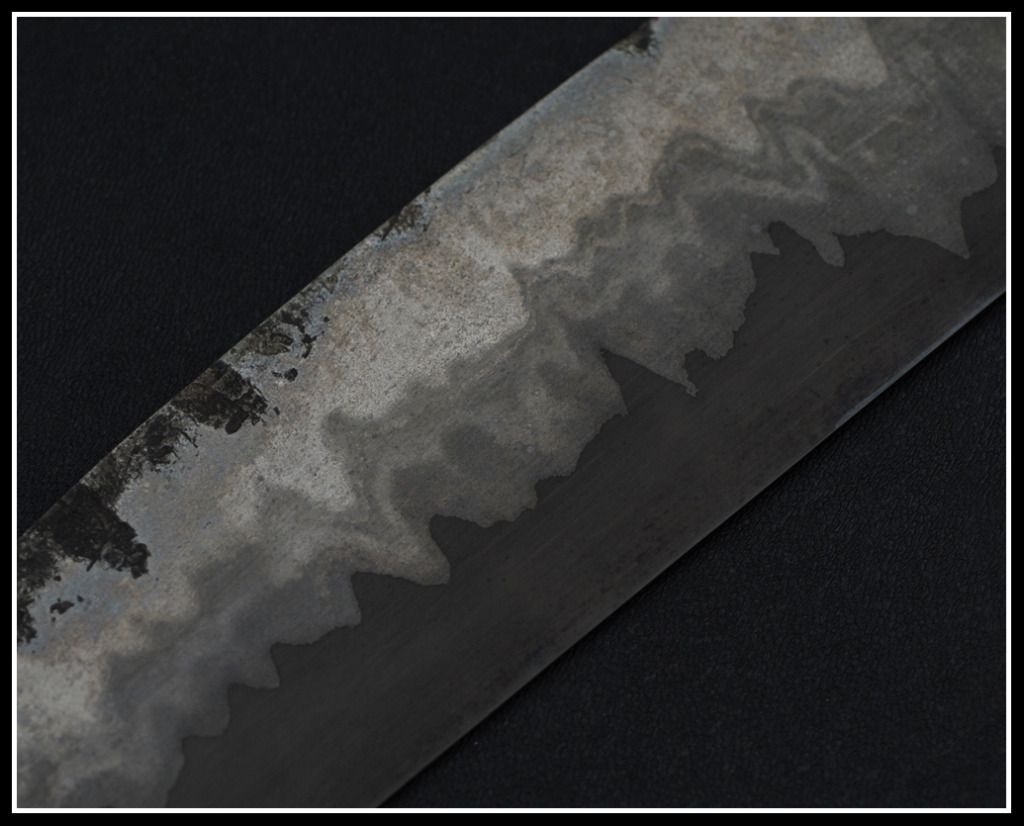
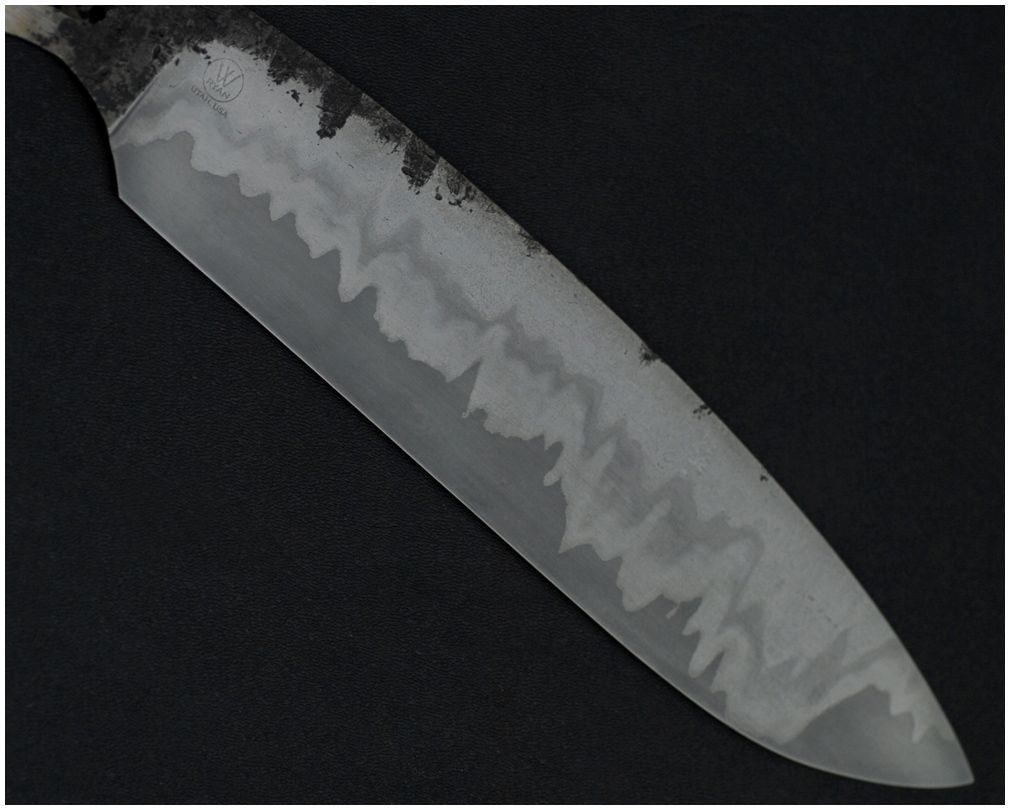
Here is the oiled up finished Etch

I am working on the handle design and materials.
In my haste I contacted Mark From Burl Source and he (As Always) said he would find some stuff that might work and throw it in a box for me. As well as some pieces I ordered for some other projects in the works.
Mike Davis also stepped up with a beautiful piece of Ironwood he had, and he would send it my way for consideration as well. I am always amazed at the generosity found here in the knife community.
Yesterday This showed up in the mail from Mark:
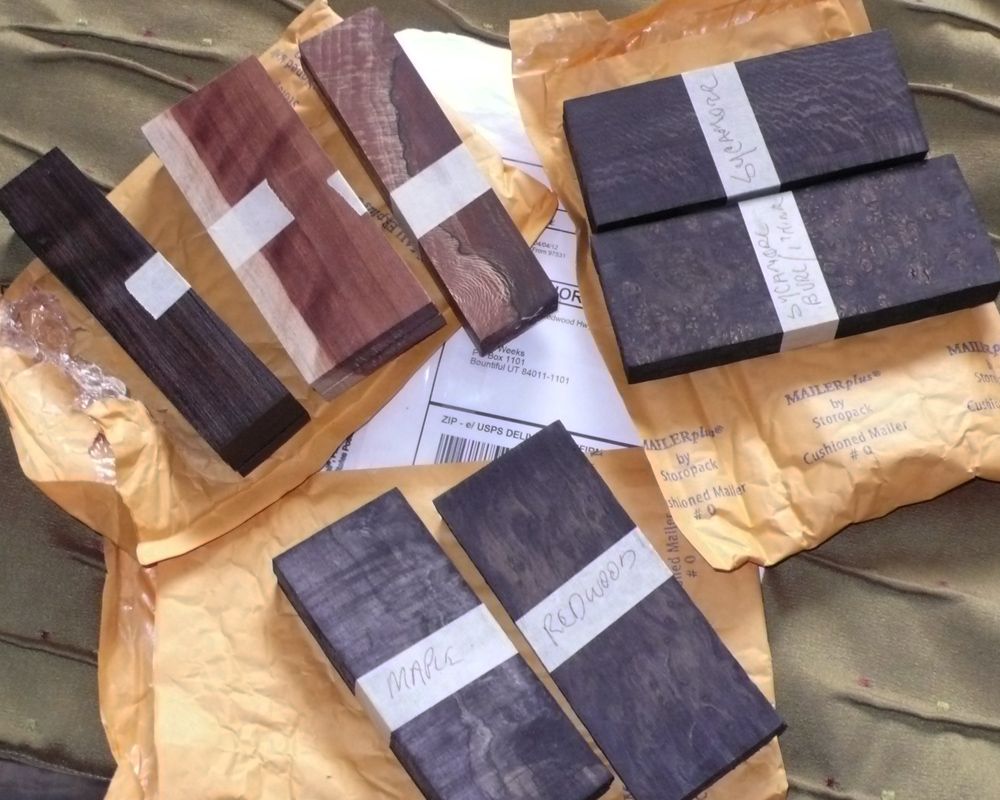
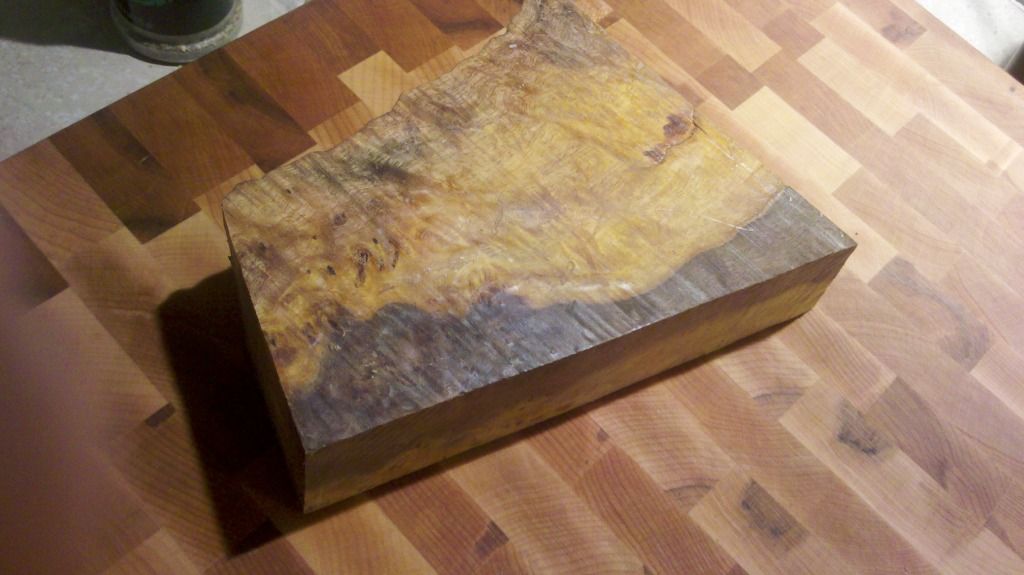
Mikes Package hasn’t shown up yet, No fault of his I am just running short on time. So I looked through the pieces and found the absolute perfect piece. Mark Nailed this one! The bottom left piece is Black Spalted Maple Burl with a perfect EKG line running length wise down the block.
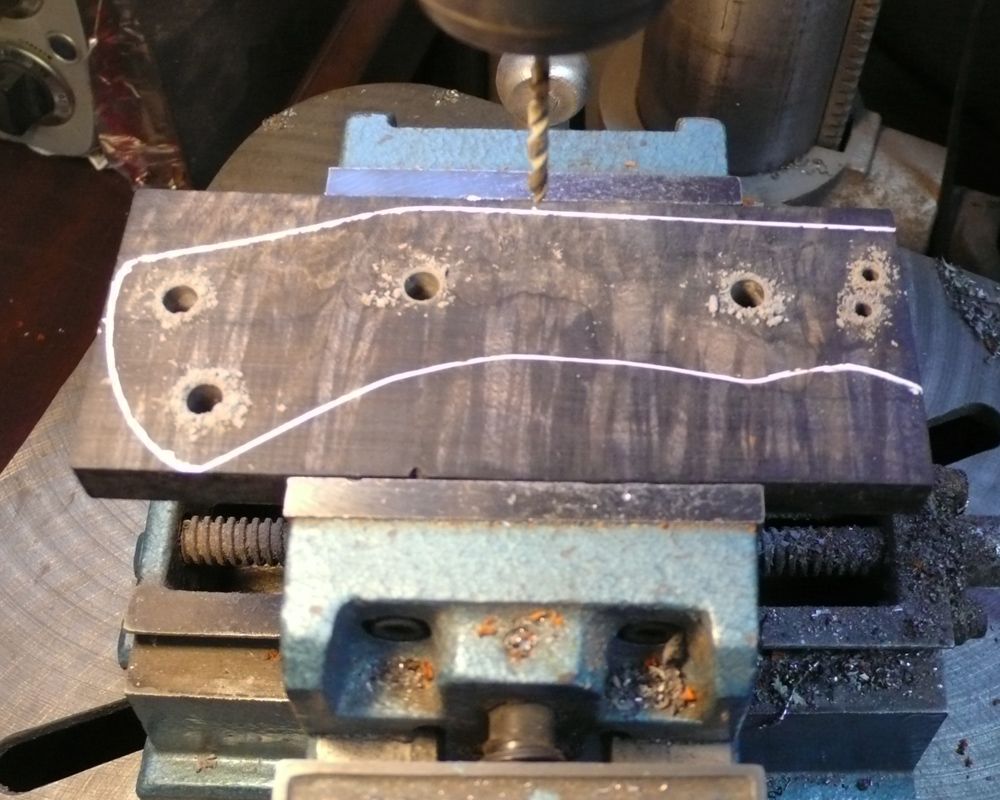
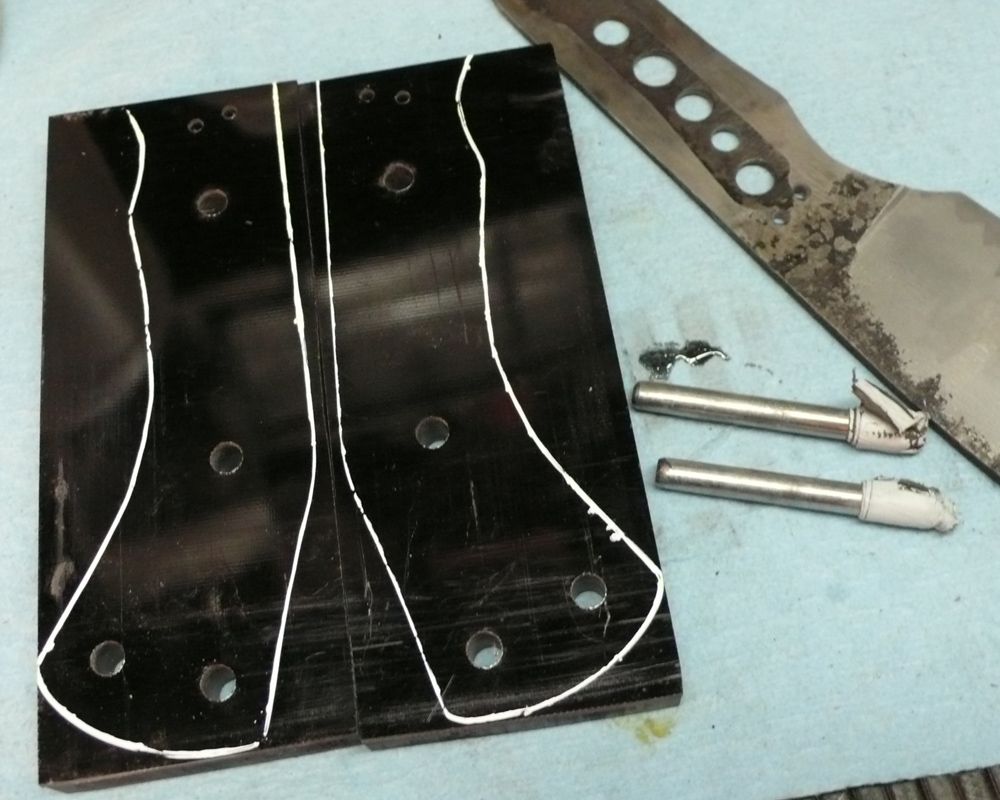
I didn’t have a lot of room to play with, I lined the tang up how I wanted the line to run. The scales are book matched so I wanted to keep them even. I clamped them together, and put them in my drill press vise, making sure the scales were flush with the top of the vice. This will keep everything square during the process.
I don’t like drilling through thick material, the bits tend to grab and heat up more. I drilled 2 alignment holes.
I then separate the scales and insert assembly pins into the alignment holes. Using white out pen outline the tang and again clamp the tang to the scale.
I take each scale to the drill press and finish drilling the remaining holes. Leaving the Assembly pins in place.
Here we have both scales drilled and the tang outlined with white
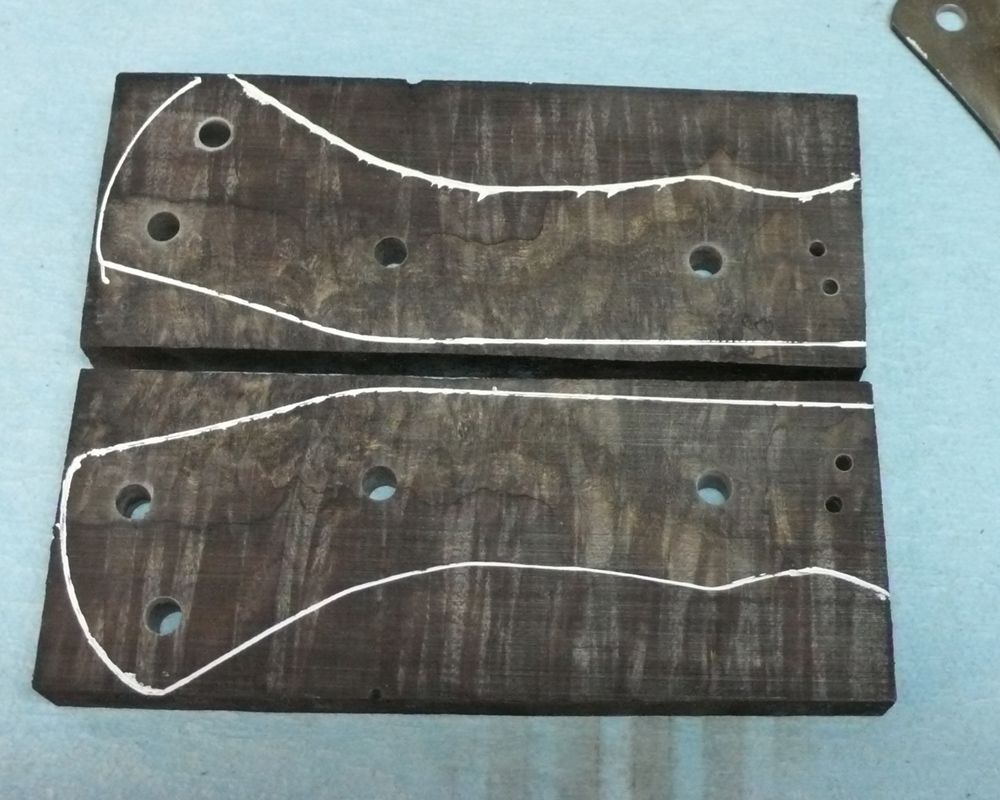
I am using ¼” and 1/8” Pins, I drill the pin holes a little bigger to allow for easier assembly and better epoxy adhesion. I drill the holes again with #F (1/4” Holes) and #30 (1/8” Holes)
I then drill shallow Epoxy holes to assure Glue will remain in contact with the tang when clamped up.
 I decided to add a G10 Liner between the Steel and the Spalted Maple so I Epoxied them up… Normally I do this before any drilling.
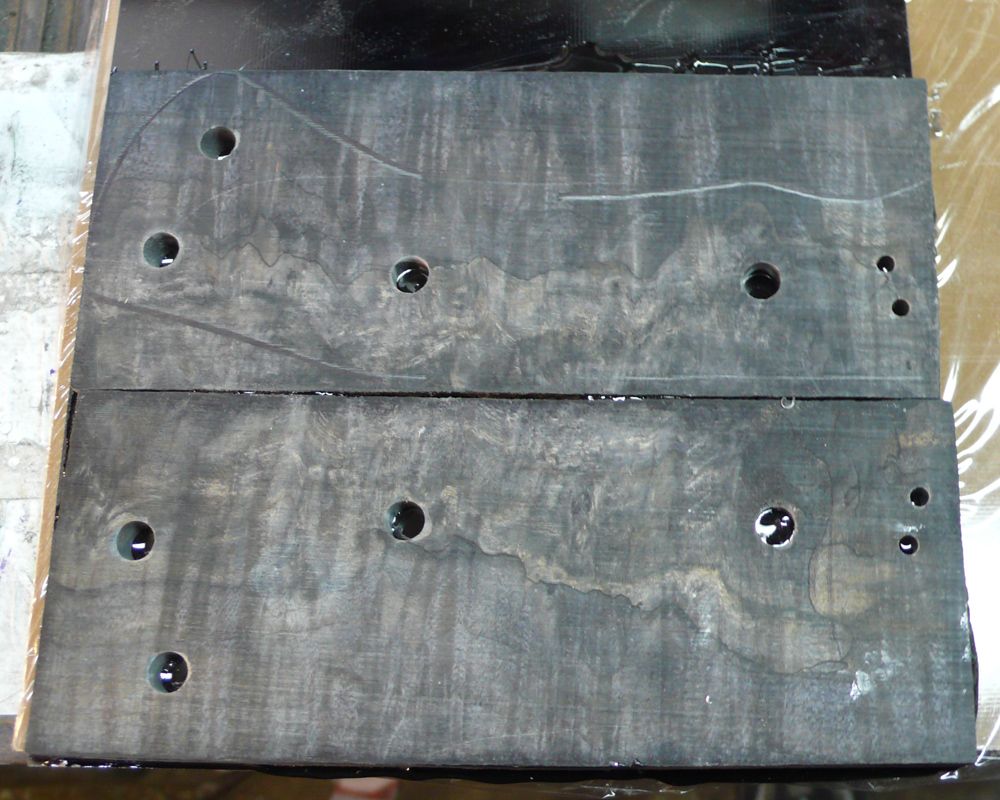
here I carefully drill through the Existing holes with the F and 30 bit to punch through the liner material.
I reapplied the White marker to the liners
and Drill the shallow Epoxy holes again, making sure to just reach the Maple scales to increase strength.
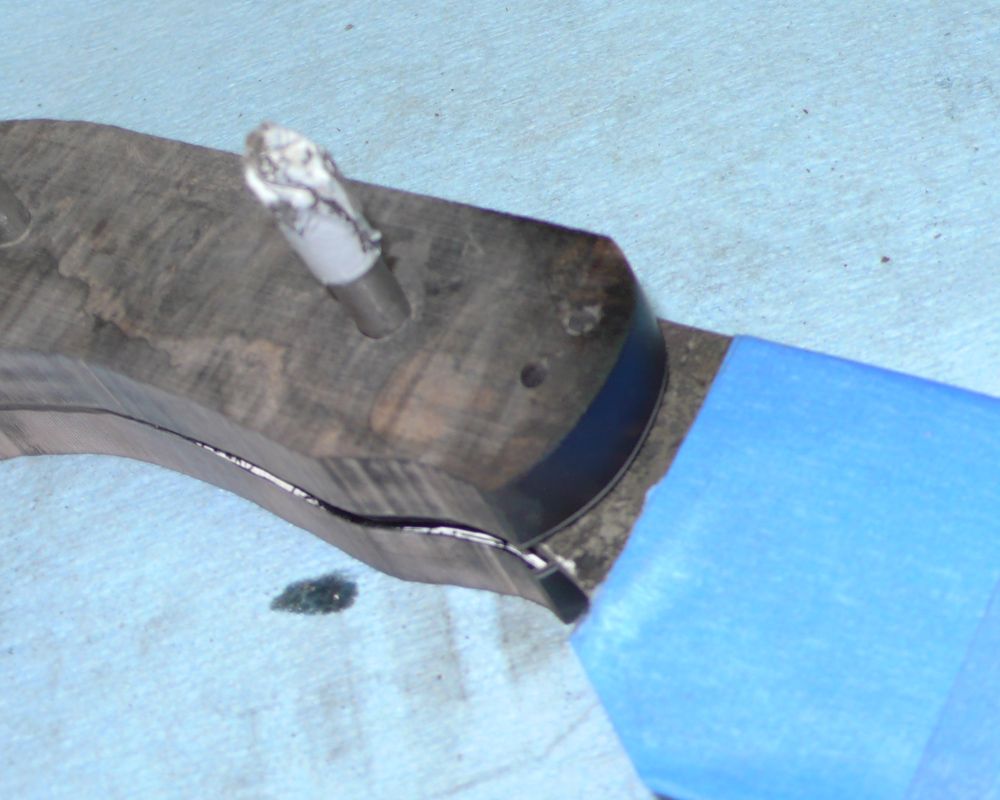
I then use the band saw to cut just outside the lines, that way the Epoxy will pool around the tang filling any voids and cracks.
Now I need to make sure the Front of the scales are finished exactly as I want them because I will not be able to work on them when they are attached to the Blade.
 Sorry for the blurry photo
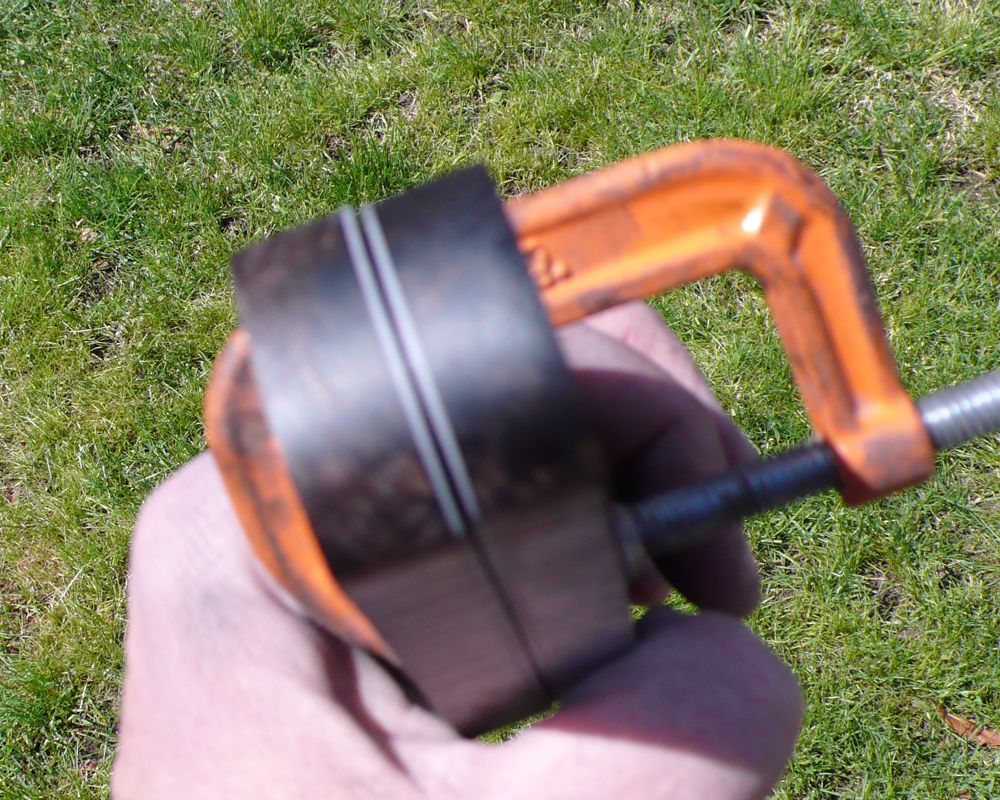
I am ready to Epoxy the scales to the Tang. I sand all the surfaces that will be glued with 100 Grit sand paper. Then wipe the surfaces with Acetone to remove any dirt or oil. I use Acraglas from Brownells and love it.
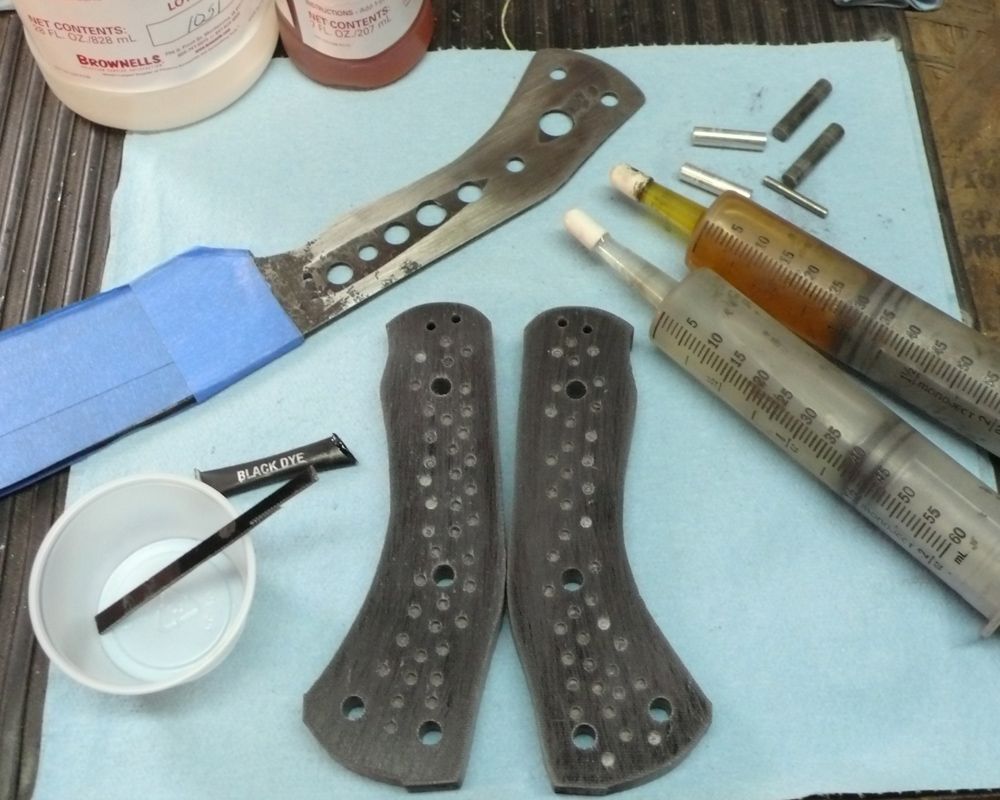
Once I have the pins cut to size I always do a dry run, nothing worse than getting the glue spread everywhere only to find you can’t get it to go together.
I mix the Acraglas (8:2) for larger knives (Or 2 smaller knives) or 4:1 for a small knife. Stir it lightly for 4 minutes then I added Black Dye
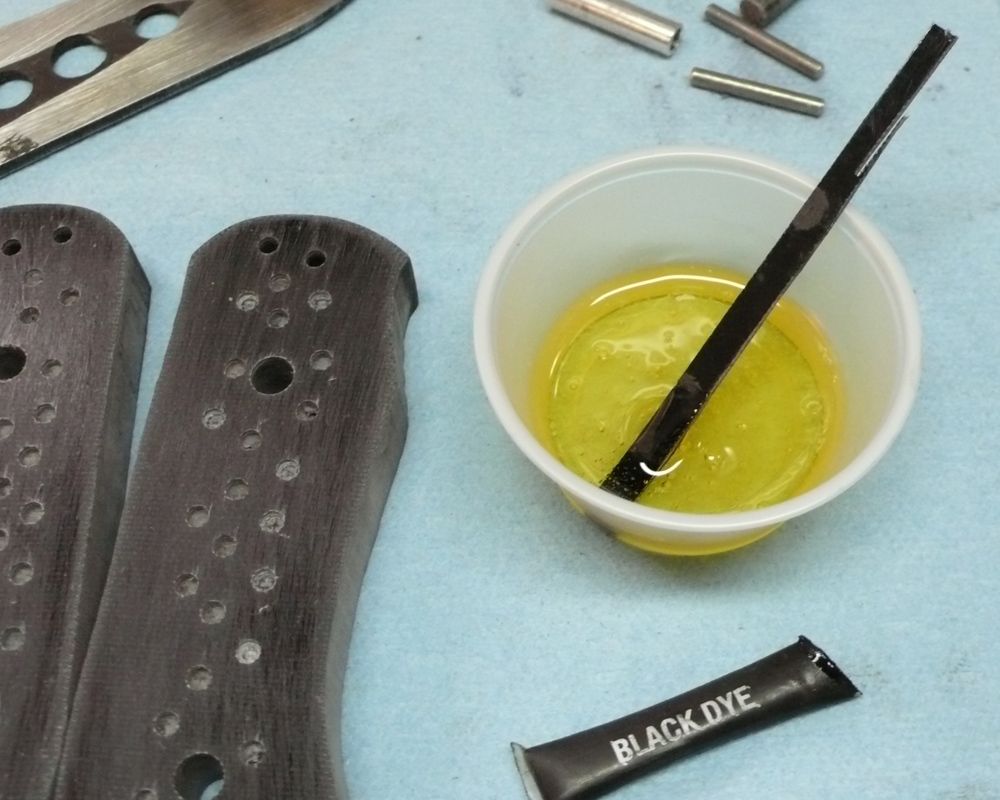
I spread the epoxy evenly over both scales making sure to fill all the holes.
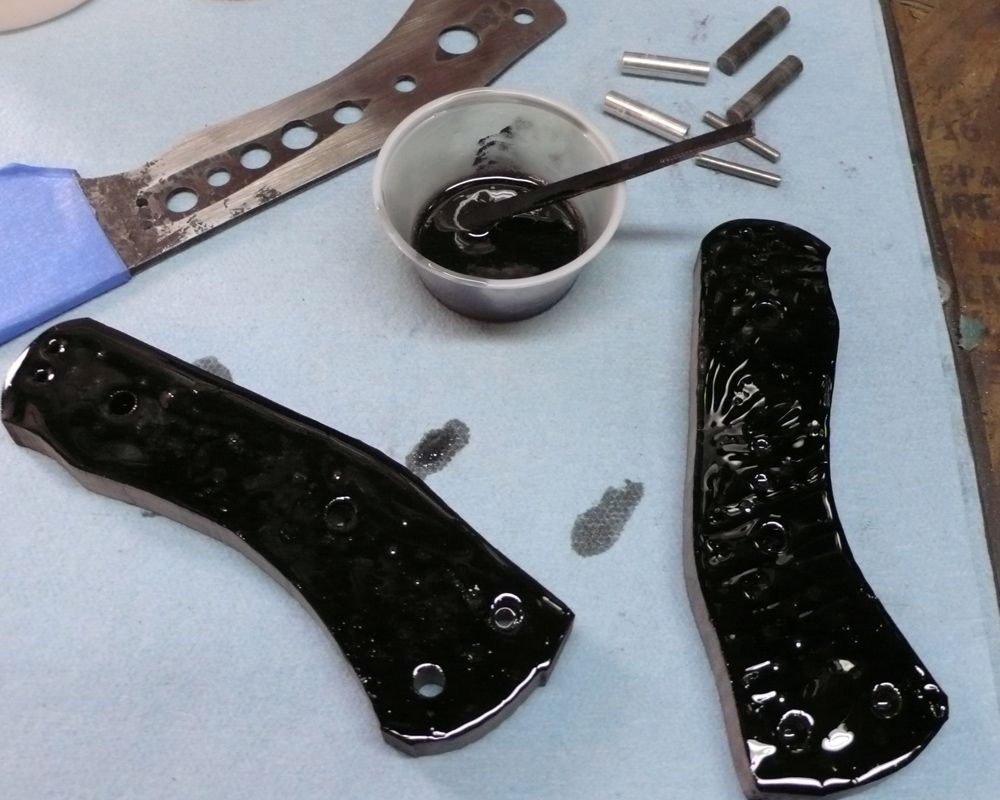
I then twist the pins into the appropriate holes to evenly spread glue around them.
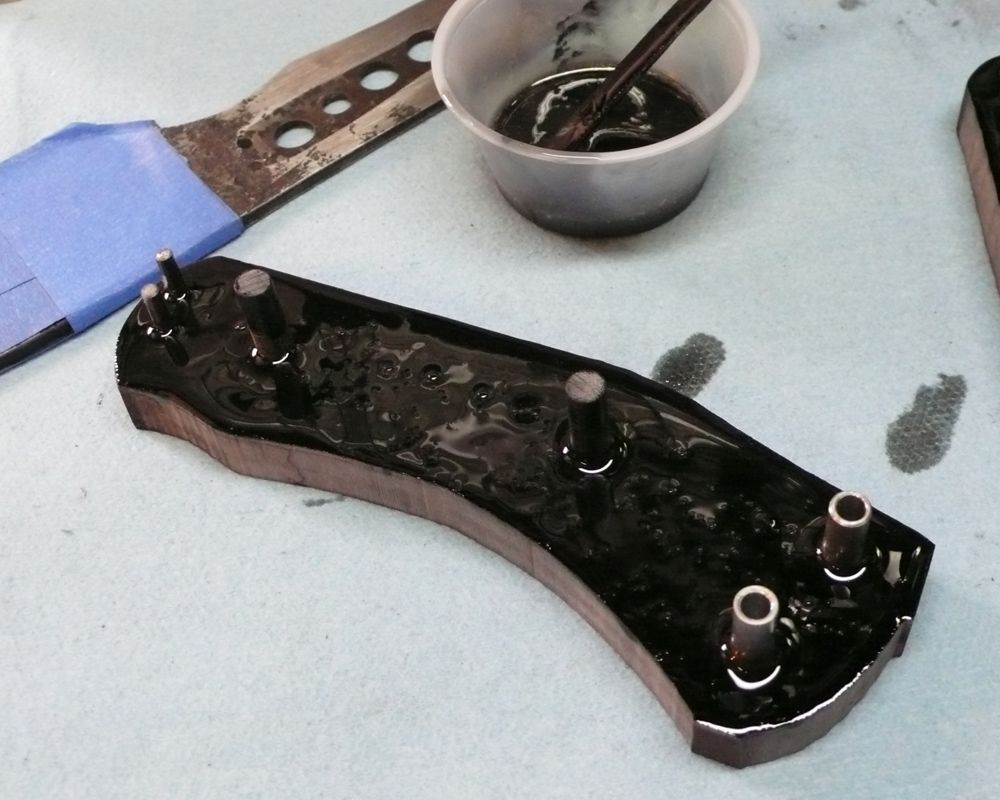
I then Slip the tang into place over the pins, and fill the voids with Epoxy
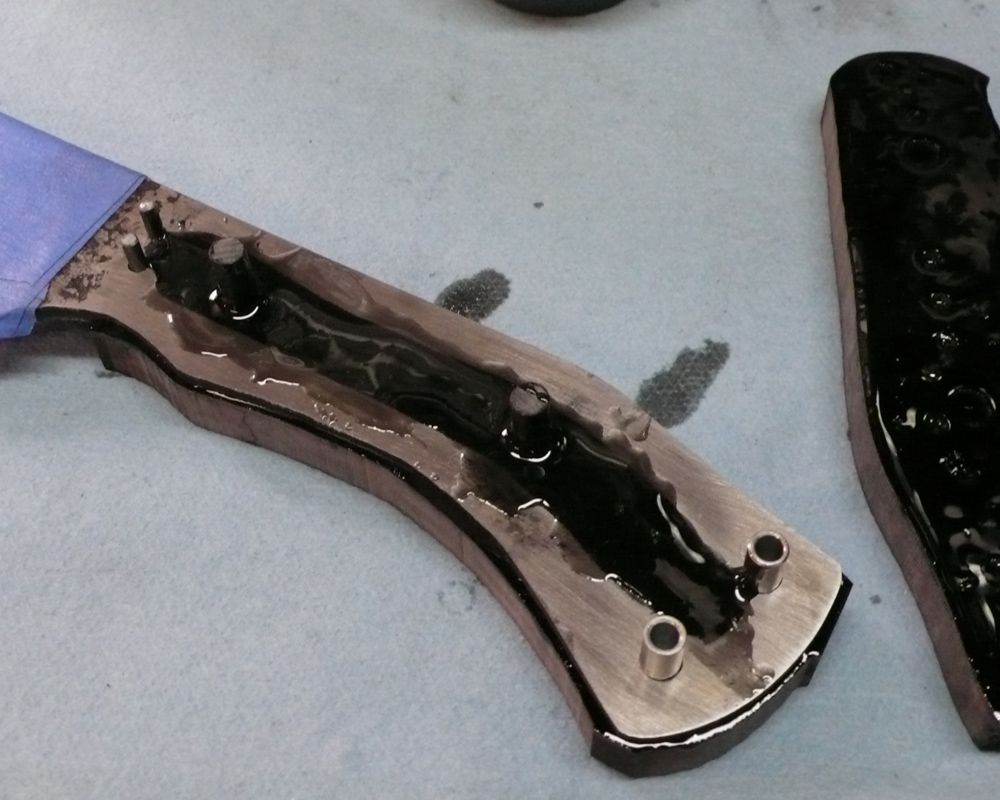
Then I slip the other scale on to the pins, and clamp them in place. Using Acetone I remove any glue that is in the ricasso area, then apply a very light coat of Oil in that area to ensure it is clean.
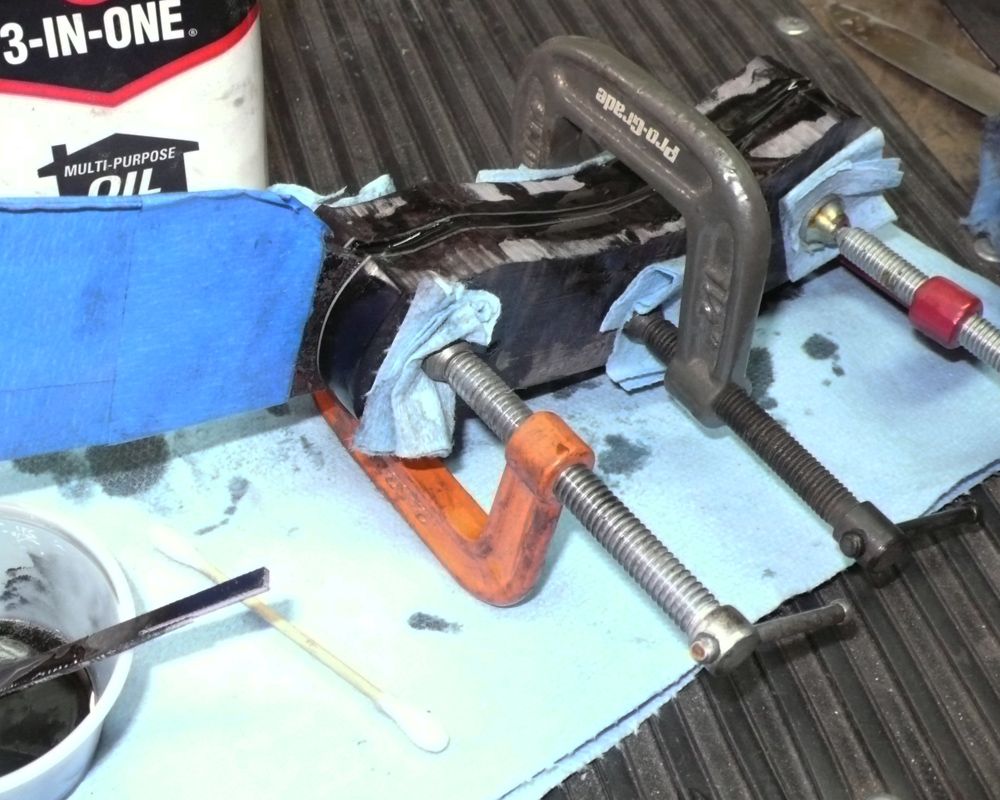
Now the Acraglas needs to cure….
I really appreciate the support everyone, this has been a fun project for me. Bruce I had heard that in the past about the liners but it seems like there are a few opinions out there (As Always). I will be using liners with any natural materials from now on, thank you!
Mike I expect to get the Ironwood in the mail today. I am absolutely positive I will love it. How about I make a Kitchen Knife in the near future? If you are not familiar with Mike Davis work make sure you check it out. He is putting out some crazy kitchen knives!
 Thanks brother.
I have almost finished everything up...
Here is what the scales look like after a 24hr epoxy cure, pretty nasty but I am pretty sure more glue is better than not enough.
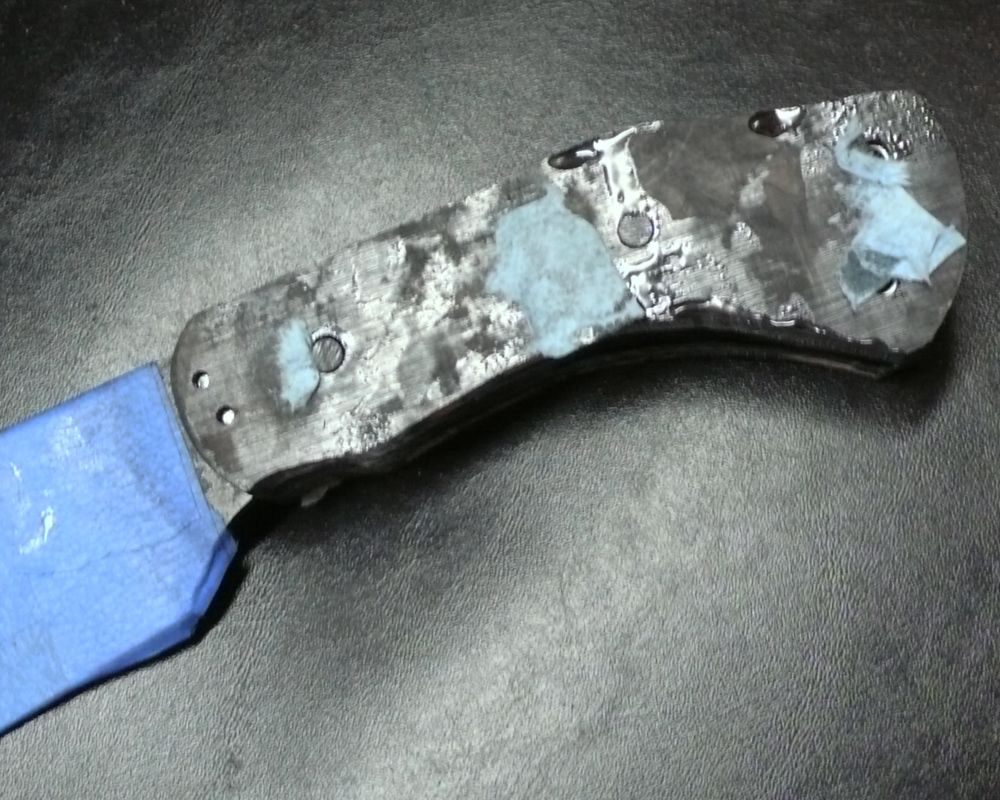
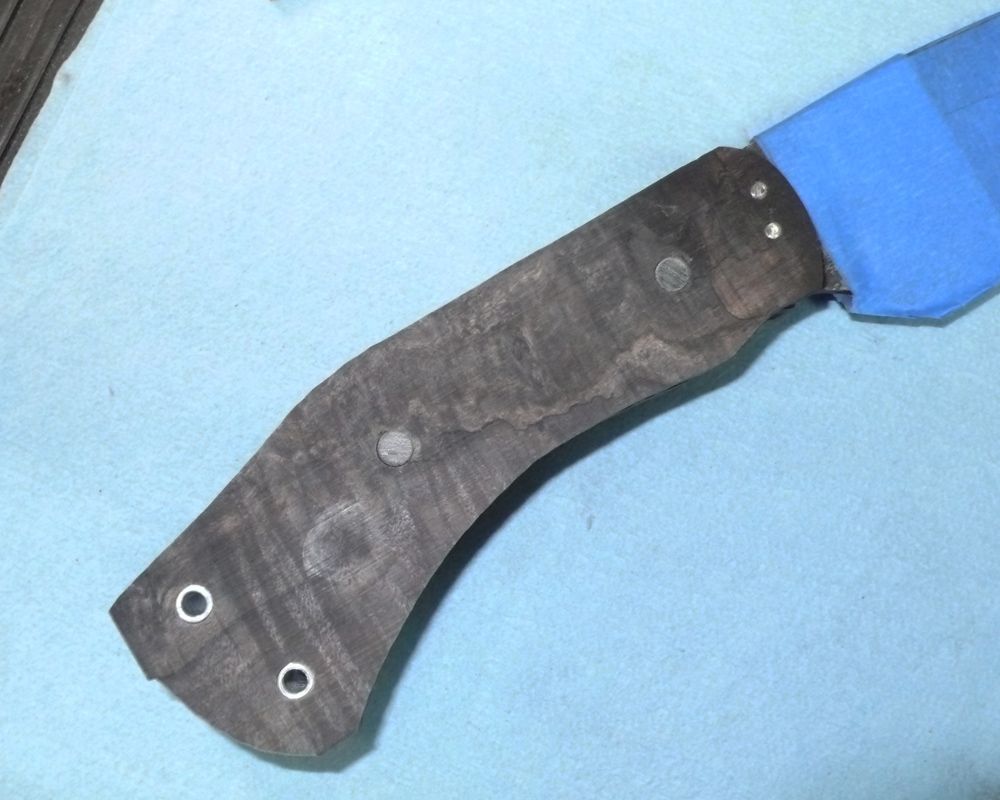
I then hit the flat platen and even out the scales and make sure I have nice clean pins without any blowout or missing epoxy. Here you can see that EKG line that I wanted to match or compliment the SanMai pattern.
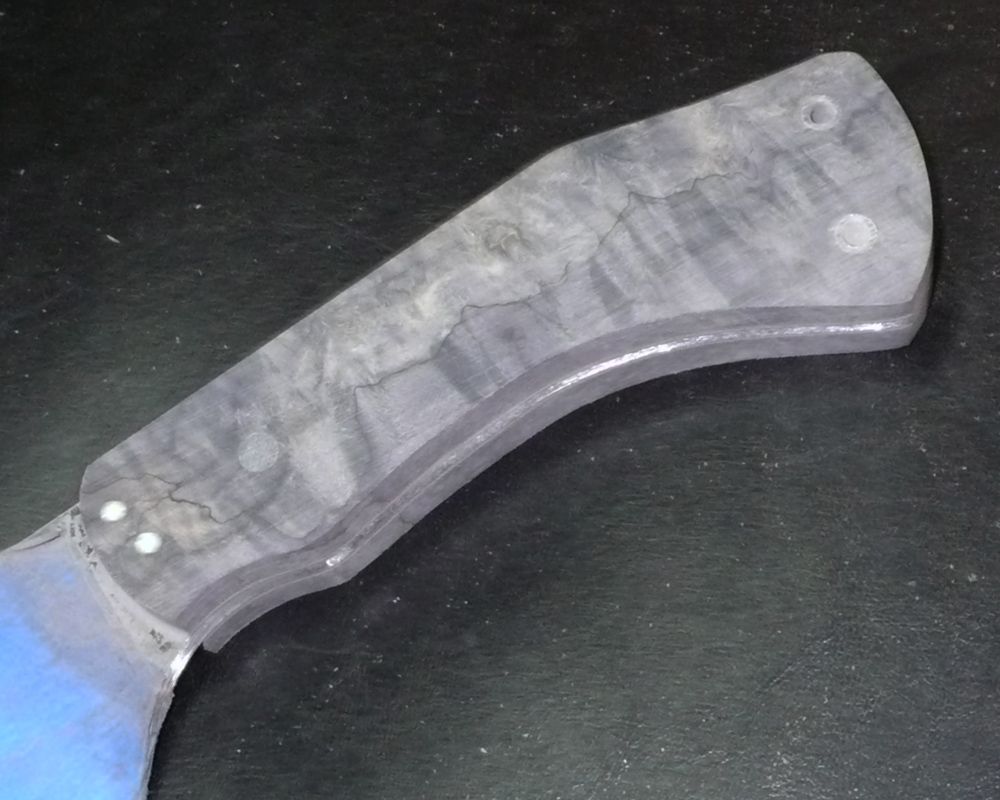
I than carefully take the scales down flush with the spine, and butt with the flat platen (On the finger section I use the 2" wheel, to keep the curves right.)
I then take the 10" wheel and start contouring the handle making the palm swell. I actually have a photo of one of Nick Wheelers handles above my grinder as an example of the contour I am trying to achieve.
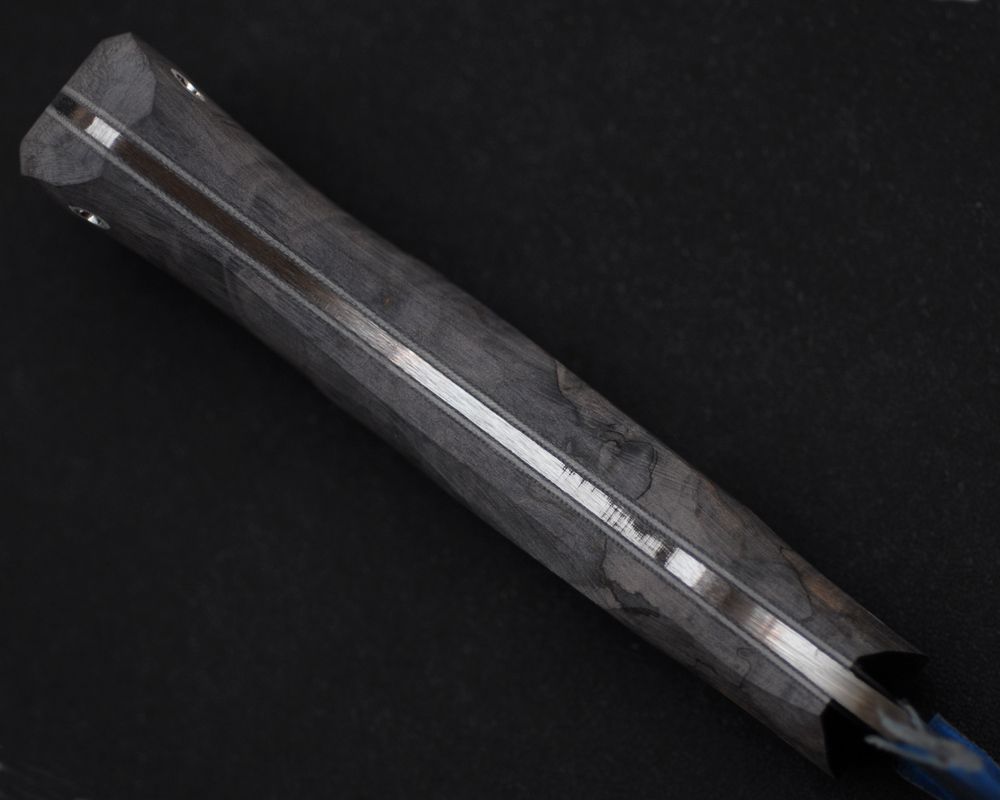
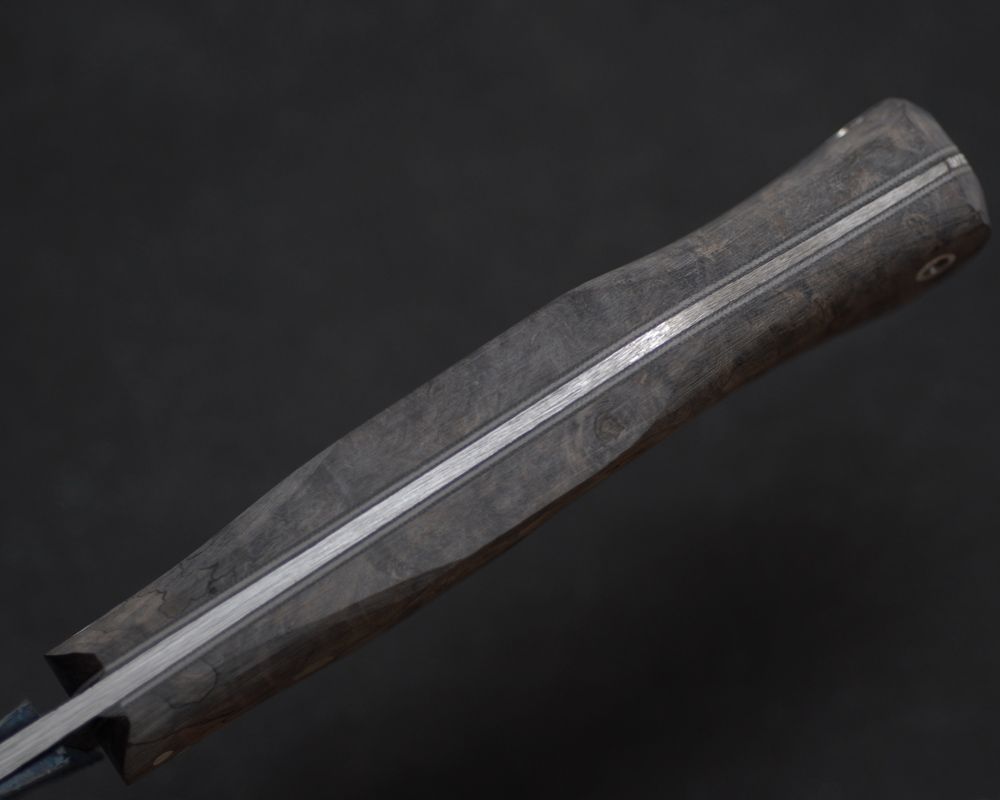
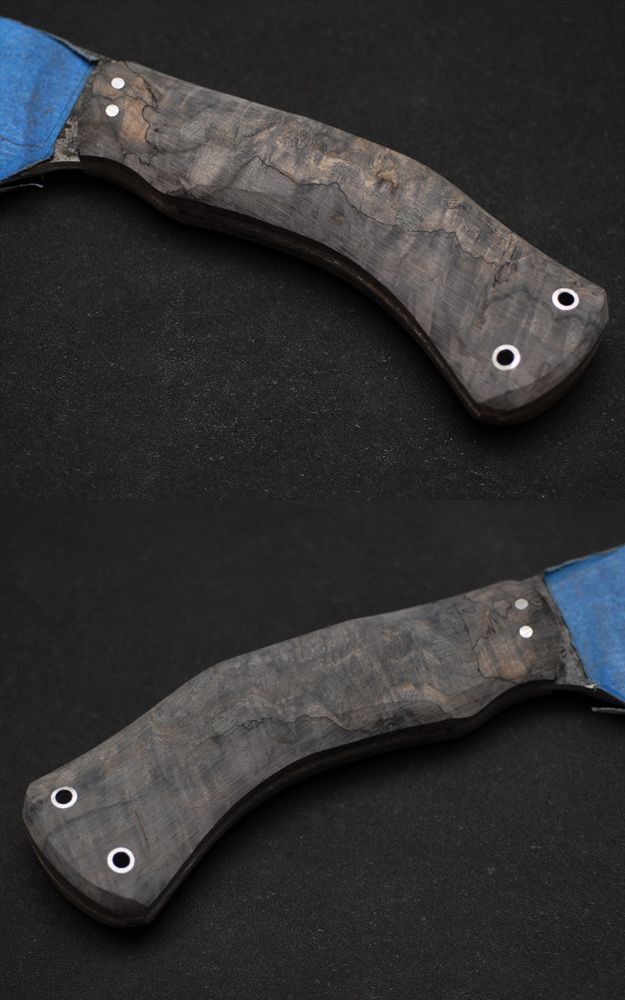
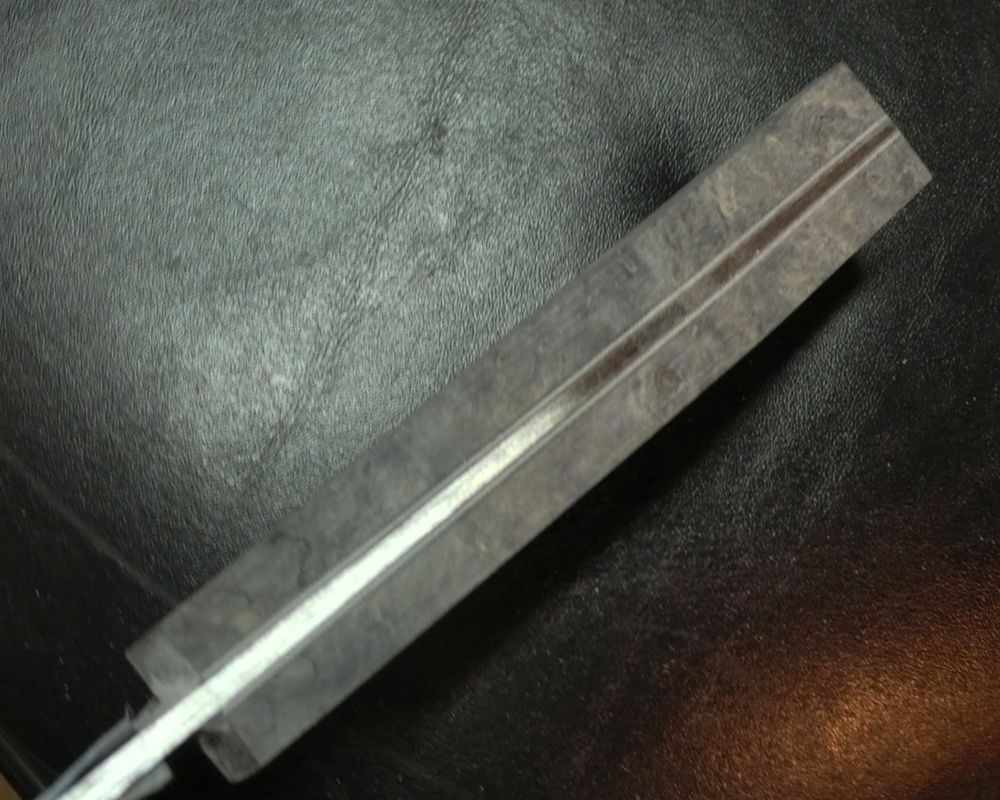
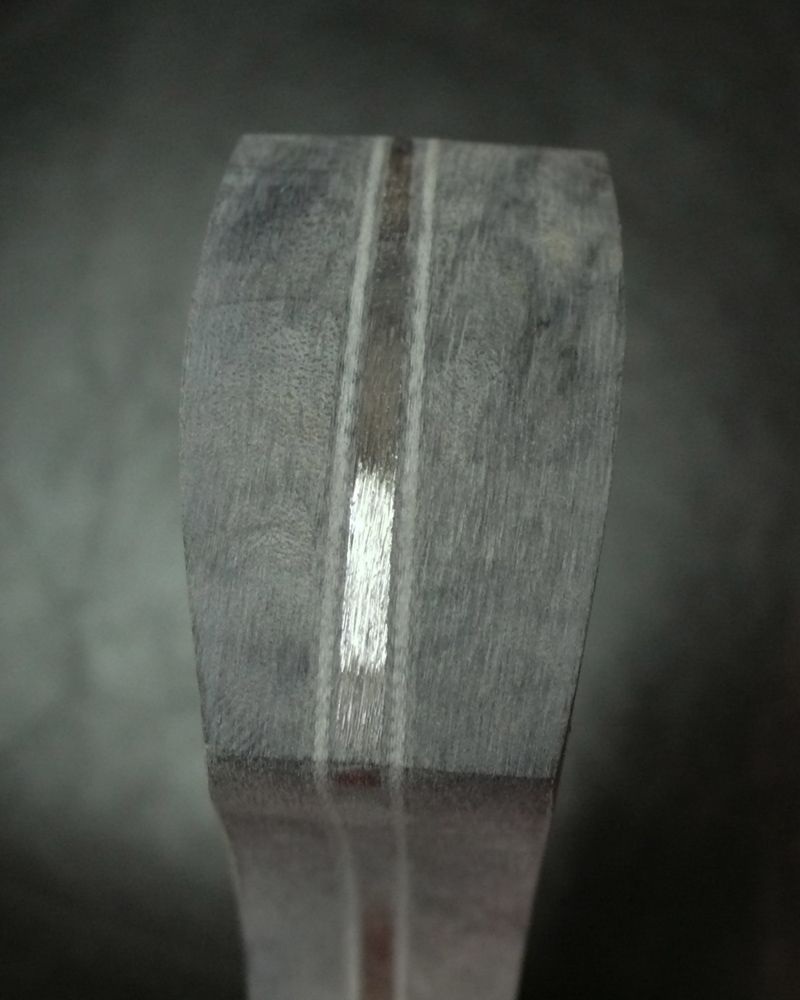
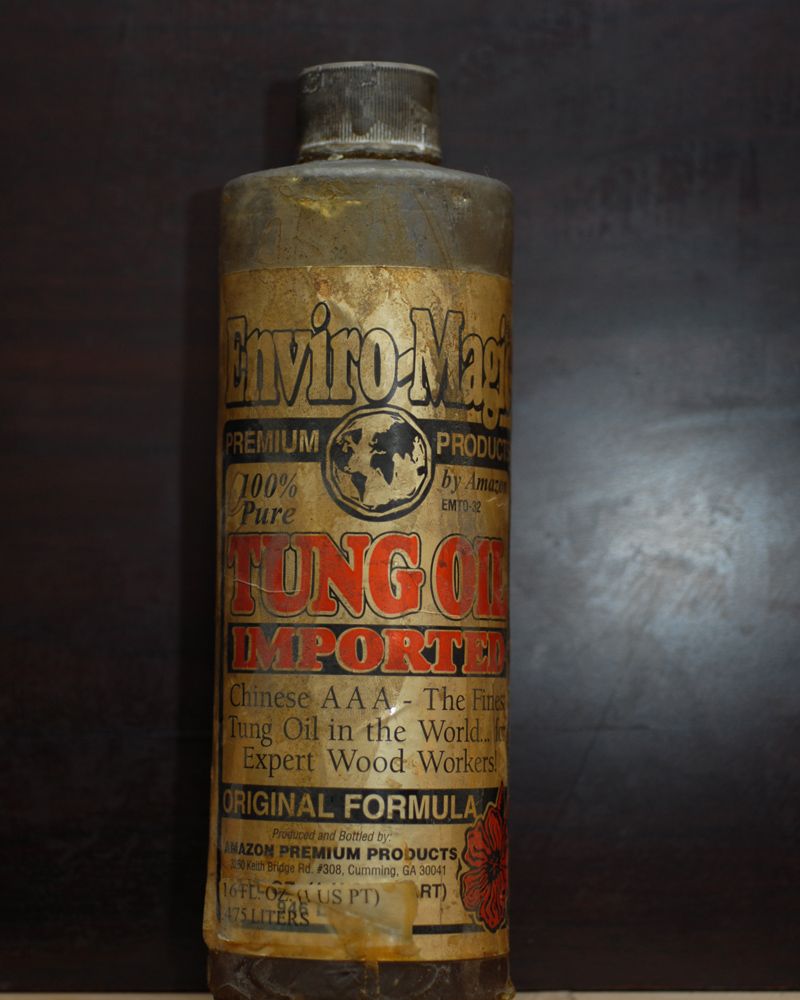
I then put the knife in the knife vise and begin hand sanding with thin strips to round the corners and blocks to make sure everything remains flat, especially around the pins and spine. Moving up through 150 the 220 Grit. I then liberally apply 100% Tung Oil, I got this stuff from the local wood working store, it was not cheap but it finished extremely well.
After 10-15 minutes the Tung oil has time to soak in, I sand with the last grit I used (220) then move to 400 and apply another coat of Tung Oil and wait. and continue up to the final grit. This actually fills any small voids and polishes nicely. I took this handle up to 1000 Grit.
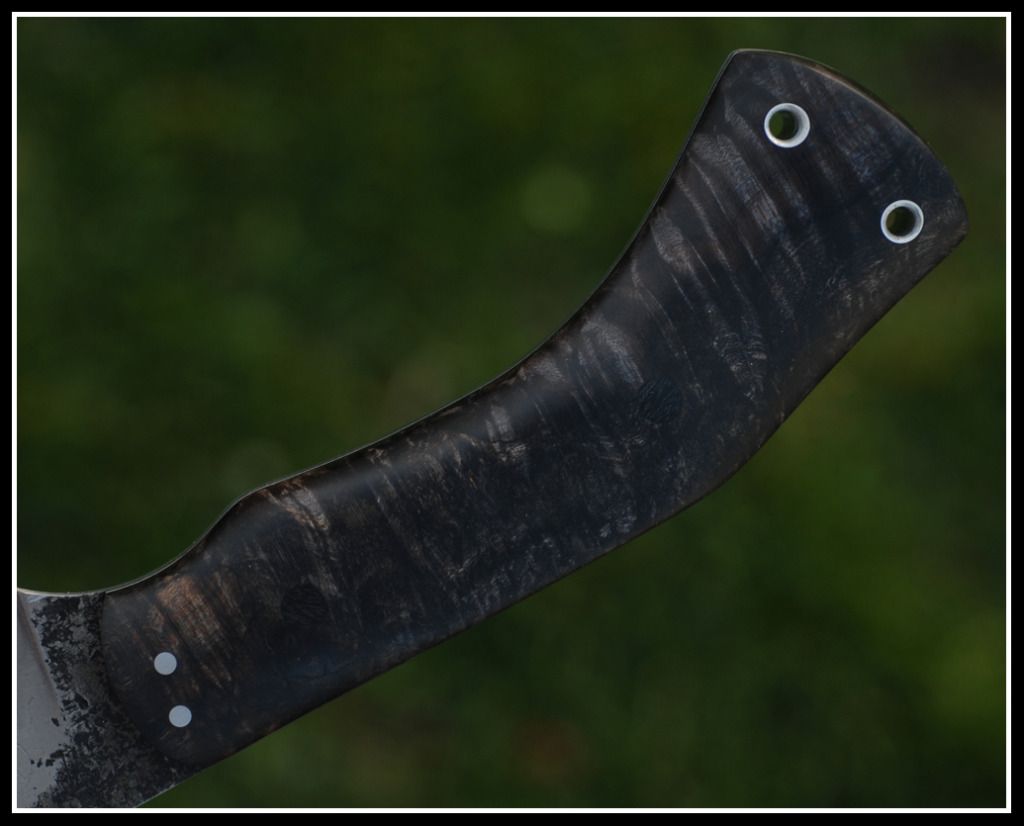
Mark, the spalted burl is beautiful, but as with any natural material it changes as you work with it. The EKG line is pretty much gone, but I am not upset at all on how it turned out. Looking at the overall package it all blends together perfectly IMO.
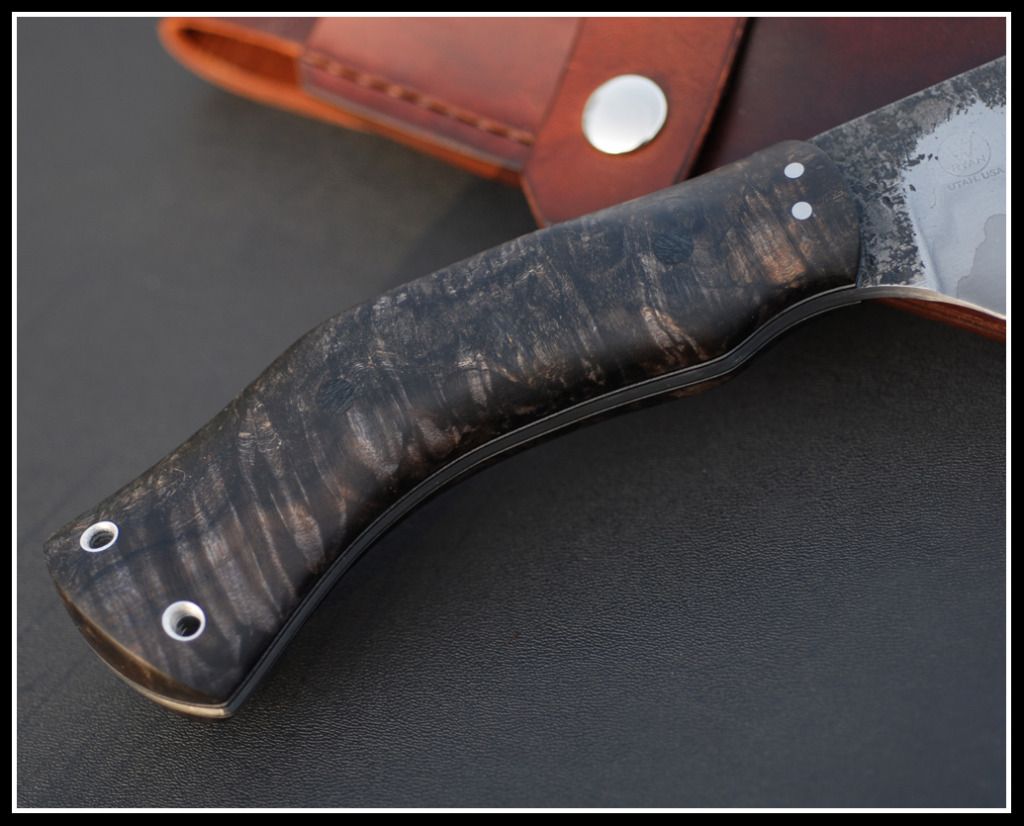
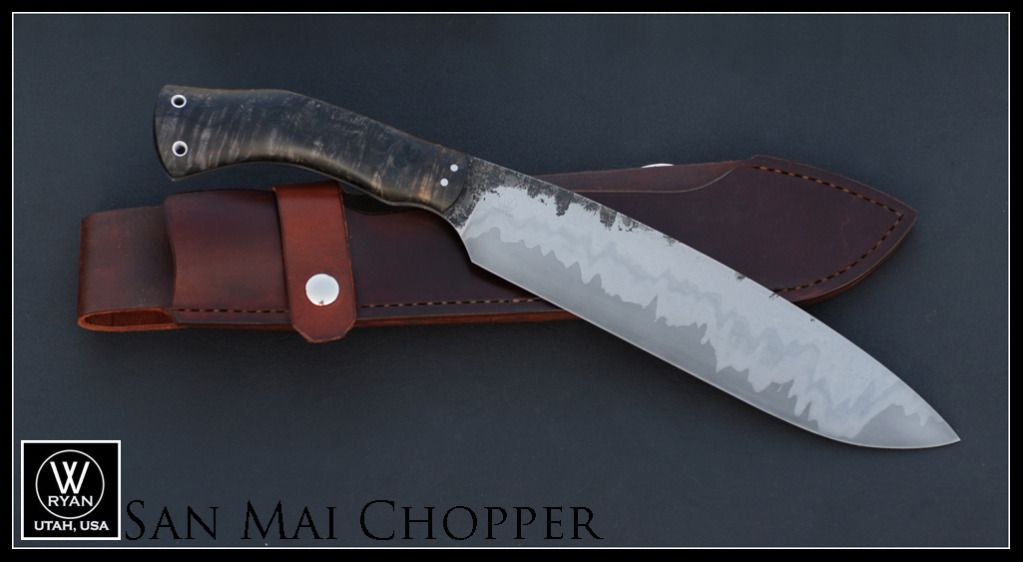
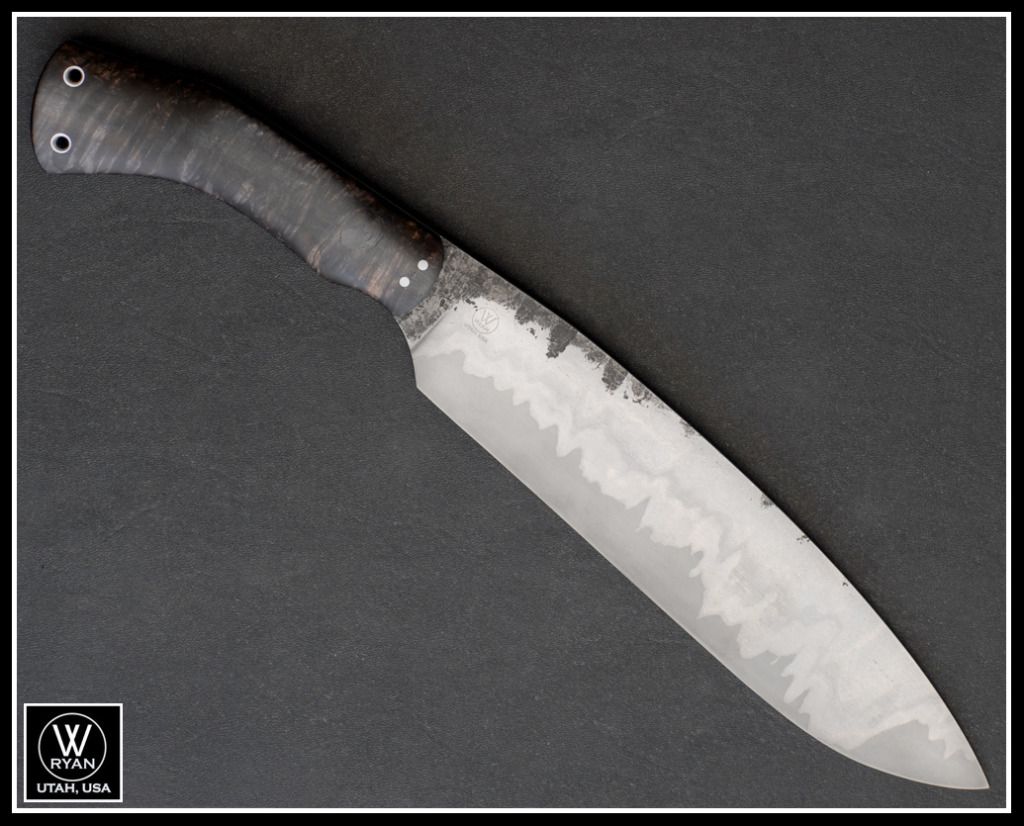
SPECS:
Steel: 3/16" Wrought Iron and CruForgeV Turner SanMai
OAL: 15.5"
Blade: 10"
Handle: Stabilized Black Spalted Maple (Burl Source)
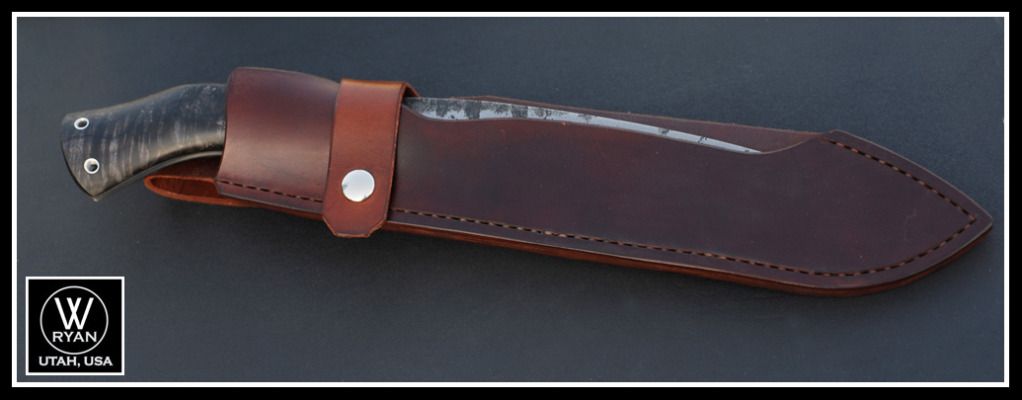
Sheath: Leather With Multiple carry options
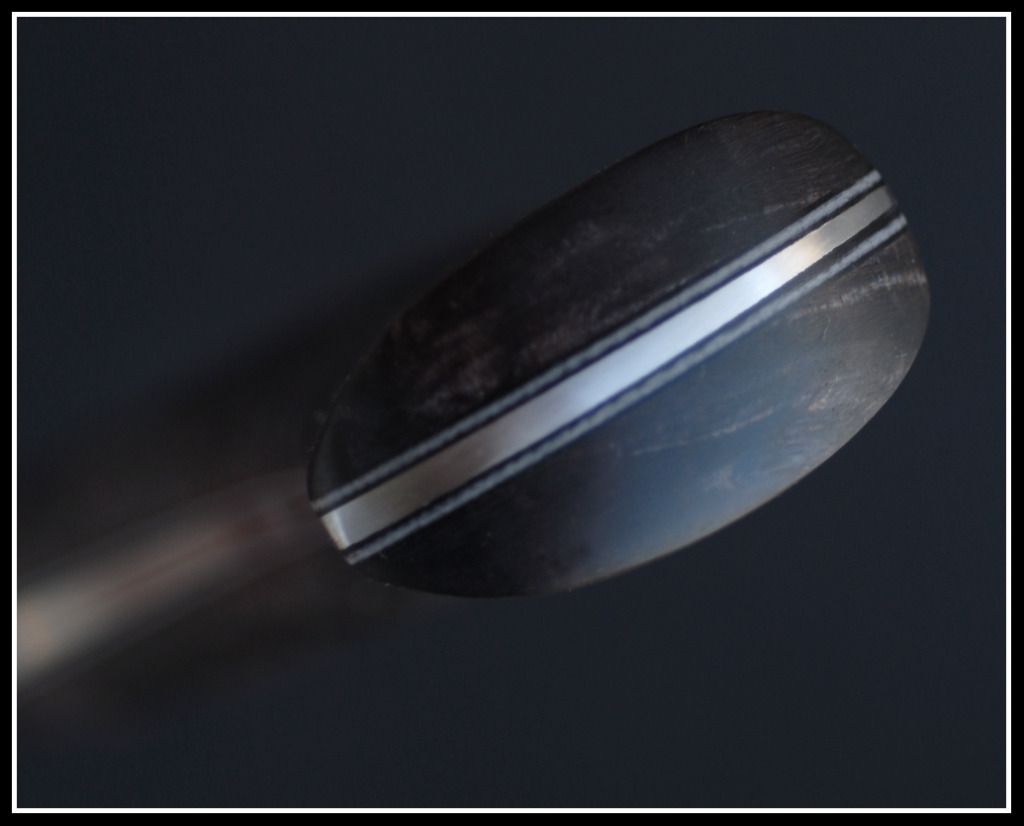
Misc: Tapered Tang, G10 Liners, Stainless and Nickel Pins
Here are the final photos. Thanks to Mike Turner for the beautiful SanMai Billet, and Mark @ Burl Source for the beautiful wood.
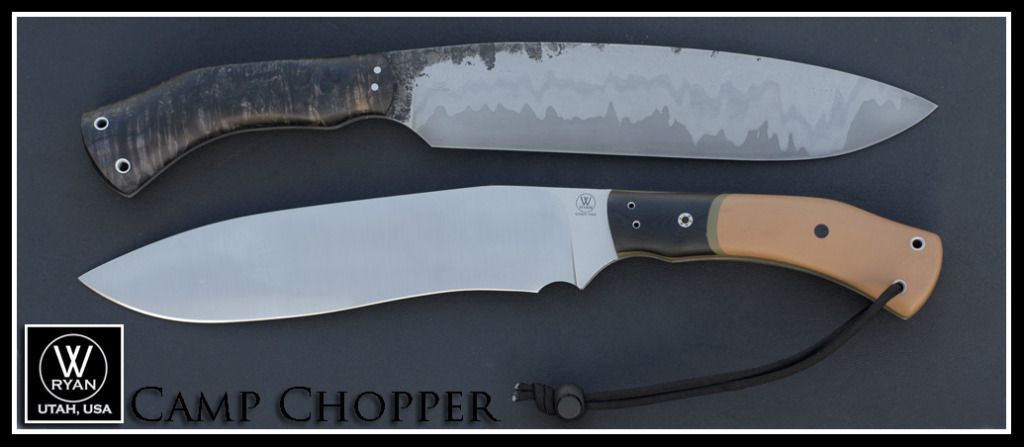
Here it is with it's recurved Brother!
Thanks for making it to the end of this LONG POST!
Resources:
Mike Turner SanMai
Mark Farley Burl Source (Stabilized Wood)
Mike Davis Knives
No comments:
Post a Comment